Posted on Leave a comment

Wacom Intuos5: The Radial Menu

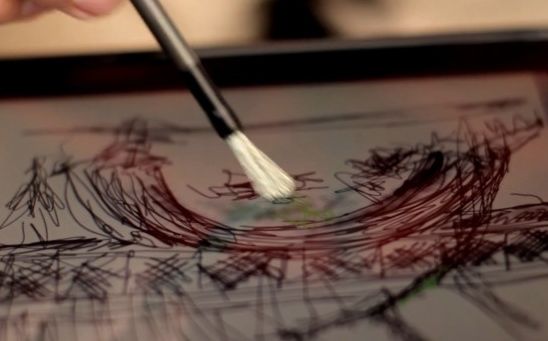
Here’s the third post about the new Wacom Intuos5 tablet.

I tried to show how to customize the tablet in one video, but it ended up being over 30 minutes long.  Since most of us have trouble sitting still for that long these days, I figured I’d break them up.  The previous one was on the Express Keys and the Touch Ring, while this one is about the Radial Menu.  The third one will be all about the new Touch features on the Intuos5, saving the best for last.

So here’s the second video, hope you like it.  It’s all technical stuff, but if you’re using Photoshop and a tablet in your work, this might give you a couple of tips and tricks to customize your tablet and get the most out of it.  Probably best to watch it at full screen, too.

Posted on 4 Comments

Wacom Intuos5: Express Keys and Touch Ring

Here’s the second post about the new Wacom Intuos5 tablet.  While my original intent was for these videos to just be reviews, I figured I’d make them more of a tutorial style.  If you’re looking for a review of the new features, I’ll just be up front and tell you that there’s really nothing I don’t like.  In my opinion, Wacom hit it out of the park with this tablet.  I’m really pleased with it.

I tried to show how to customize the tablet in one video, but it ended up being over 30 minutes long.  Since most of us have trouble sitting still for that long these days, I figured I’d break them up.  This one is on the Express Keys and the Touch Ring, while the next one will be on the Radial Menu.  The third one will be all about the new Touch features on the Intuos5, saving the best for last.

So here’s the first video, hope you like it.  It’s all technical stuff, but if you’re using Photoshop and a tablet in your work, this might give you a couple of tips and tricks to customize your tablet and get the most out of it.  Probably best to watch it at full screen, too.

Cheers!

Posted on 3 Comments

Welcome to the Wacom Intuos5 Touch

One of the things that sometimes irks me about product reviews is that they can often end up being many pages long and nobody really has that kind of time anymore.  With that in mind, I thought I’d talk about my new Wacom Intuos5 tablet in a few different blog entries, this being the first, partly because I need to use it for a little while before writing about the new features in detail.

Anybody who reads this blog, has watched my DVDs or heard me talk about my work knows that I’m a big fan of Wacom tablets.  In fact, without a tablet, I couldn’t paint the way I want to paint.  I’m usually pretty ‘live and let live’ when it comes to painting software and when people ask about Painter vs. Photoshop or other choices out there, I’ll usually say to try a few of them, and see what you like best.  But when it comes to hardware, you absolutely need a tablet to draw or paint digitally, and Wacom is the gold standard.

I’ve had a number of different tablets over the years, my first one in the late 90’s.  That was the first generation Intuos 4X5 tablet, and it worked so well, that despite changing nibs and a couple of transparent overlays, the only reason I upgraded was because I’d bought a new computer.  The original Intuos had a 9-pin connector and the new computer only had USB ports.  But that original Intuos tablet never failed me over many years.

In addition to that tablet, I had a 4X5 Graphire for my laptop.  Since then, I’ve had a medium Intuos3, a medium Intuos4, a small Intuos4, and a Cintiq12wx.  The Cintiq12wx  may be smaller than the latest massive 24″ HD Cintiq (which I am currently saving up for), but it’s a great tablet for live painting demonstrations.  Sometimes, when I’m tired of working in my home office, I’ll often set up in front of the TV in the living room with the Cintiq and paint while watching a movie, too.  The small Intuos4 has always been a great travel tablet, and since I worked on that size for years at the beginning of my career, I’ve never felt hindered by the smaller work space.  If I needed to, I could still do all of my work on the small size tablet today, even the paintings.

But the tablet that fits right into the Goldilocks zone (just right!) is the medium sized Intuos.  A few years ago, when I heard they were launching the Intuos4, I remember thinking that my Intuos3 was just fine.  Why would I bother upgrading?  Of course, once I saw the  new configuration of the Express keys and the Touch Ring, not to mention those pretty blue LED lights, I knew I’d be getting one.  The Intuos4 medium has been my day to day tablet every day since it was launched in 2009 (has it been that long?) and to be honest, I’m a little sad to see it go.  It has now been relegated to my laptop bag, and I’ve donated my small Intuos4 tablet to a graphic designer friend who didn’t have one yet.

I’ve been watching videos online and read some reviews about the Intuos5 before mine arrived, so there were really no surprises about the new features.  However, hearing about it and watching somebody else talk about it pales in comparison to actually using it.  Even though I’m not going to show pics of me un-boxing the thing, because it’s already set up, one of the things I do like about Wacom products is the packaging.  The devices themselves have always felt sturdy and I’ve never questioned the quality of the materials.  But when a product arrives in slick looking packaging, it makes you feel just a little bit better about your purchase, and this tablet came in a very nice, well designed box that almost looks like a case.

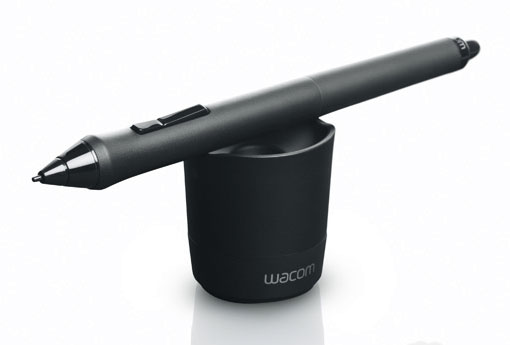
All of the individual pieces, as few of them as there are, were well wrapped and configured inside.  The tablet, connection cord, pen, and pen holder (which contains ten spare nibs of different design), along with the documentation, are all that you need.  The physical look of this tablet has changed, as should be expected, but the texture of the materials is also different, although the pen itself feels pretty much the same.  The main body of the tablet now has a bit of a rubbery feel to it.  Not as pliable or spongy as the pen grip, but not the typical hard plastic of most computer components either.  This rubbery surface now completely covers the express key buttons and most of the touch ring, and the LED lights are absent.  A little disappointed those are gone, because I kind of liked them, but I really like the look and feel of this new design.

The main drawing area feels different to me as well, a little more textured, but still smooth enough for easy pen movement.  Not that I’ve ever disliked a tablet surface, but I think I prefer the way the pen feels on this surface over any that I’ve used before.  I’ll reserve my final opinion on that until I’ve spent some real time painting with it.

Apparently I’m a slow learner.  When Wacom first announced the Intuos5, I once again thought, “What could they have possibly done to make it better than the Intuos4?”

Well, they added touch features.  In my mind, that changes everything.  After downloading the new driver from the Wacom site, and restarting my computer, all of the new touch features on this tablet came to life.  I’ve never really liked track pads on laptops, as I found them too small.  What the touch features have done on this new tablet, however, is turned it into a BIG track pad, and it’s great.  I normally use the pen to navigate my way around the computer, no matter what program I’m using.  Now, I’ll only need to pick up the pen when I’m drawing and painting.

After an initial exploration of what each of the touch features does in the Tablet Properties and testing them out in Photoshop, I don’t mind admitting that I might have giggled a little.  I’m such a nerd for this stuff, and I can see having a lot of fun learning how to incorporate these new touch features into my workflow.  The whole goal with a tablet, at least for me, is to eliminate using the keyboard at all.  I’ll have to spend some time configuring and using the new features, but that’s what I’m aiming for.  I’ll talk about setting up those features in the next blog entry on this tablet, and I’ll include some video.

First impression, I love this thing, but I never expected not to, having never been disappointed by a Wacom tablet.  More later once I get a better feel for it, but right now, I want to get painting.

.

Posted on Leave a comment

Brush Design in Photoshop User Magazine

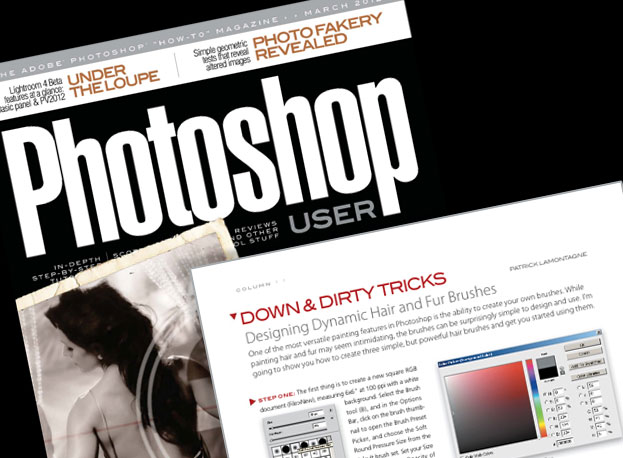
The March issue of Photoshop User magazine has now been released.  If you’re a subscriber, it went out in the mail today or you can download it on the Zinio reader right now.  In the ‘Down and Dirty Tricks’ sections, I’ve got a four page step-by-step on Designing Dynamic Hair and Fur Brushes with some tips on how to use them.  This article was a challenge to write, as I wanted to make sure that I didn’t miss anything crucial, and I’m pretty pleased with how it turned out.  While brush design in Photoshop is an art form in and of itself, this should get you started.  The rest you get from putting in a lot of time and practice.

For more on how to paint fur and hair in Photoshop, check out my DVD, “PhotoshopCAFE Masterclass: Animal Painting in Photoshop.

Posted on 2 Comments

Wacom’s Inkling – Lowering Expectations

Anybody who knows me or follows my work is well aware that I’m a big fan of Wacom tablets, so when I had the opportunity to put the new Inkling through its paces, I really wanted to like it.  If I drop all pretense, I’ll admit to being a little apprehensive about writing an honest review, as I really enjoy working with these folks.  But I also didn’t want to mislead any artists into buying the device and have them hold me responsible when it didn’t live up to their expectations.

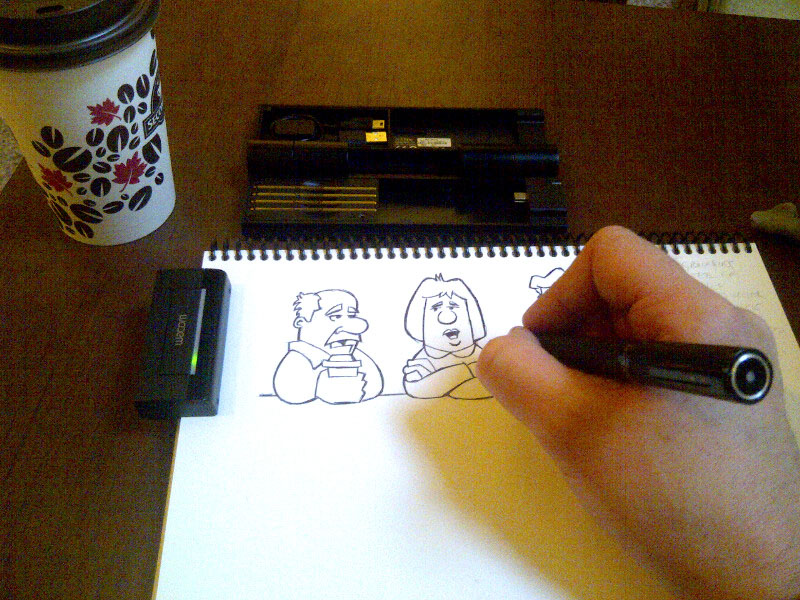
The purpose of the Inkling is ingenious.  Attach a small clipped box to whatever page you’re working, use a pen device that draws just like a ballpoint pen, albeit a little larger in size, and whatever you draw is saved as a file, ready to be imported into your computer.

Let’s start with what I liked.  The device itself is elegant.  I doubt I could come up with any improvements in the case design, as everything fits together nicely, the pieces feel solid, and the case itself has a nice weight and construction.  Definitely doesn’t feel like a cheap piece of plastic that will break in a month.  While I’m normally a pencil sketcher, I did enjoy drawing with the pen.

Unfortunately, there’s a lot more that I didn’t like about the experience.  Frankly, the software is clunky.  While I’m not an engineer and can’t quite give a lot of specifics on where the shortcomings lie, it just didn’t seem comfortable to work with.  While it has a feature that records all of your strokes, enabling you to scrub or play them back, I didn’t really see the point.  Additionally, the layers didn’t really seem to work well for me, either.  I never felt the need to separate my sketches into components.

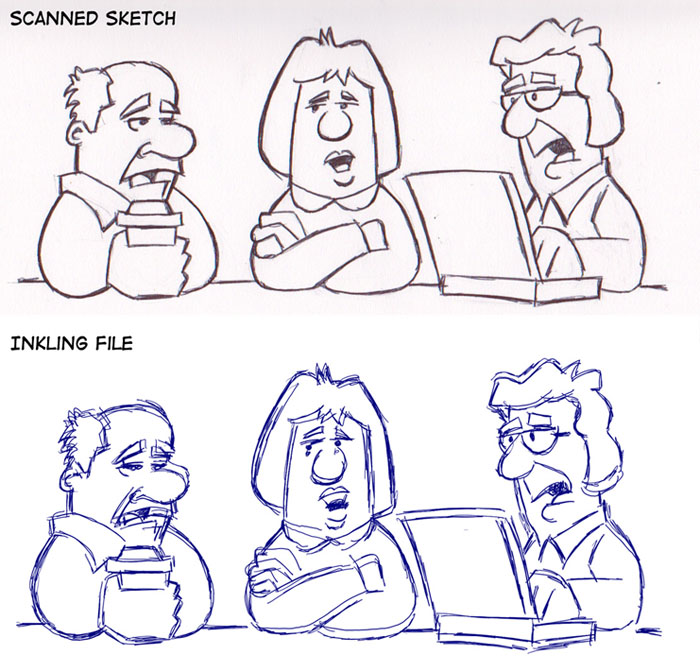
The biggest issue I had with the device is that it has serious accuracy issues.  In an effort to test this, I created a pencil drawing in my sketchbook, erased it until it was faint, and then traced over it with the Inkling pen, trying to get as clean a drawing as I could.  I created a total of four new layers, going over the same lines in places, just to test the accuracy.  Here is the result of that particular drawing experiment.

As you can see, the layers don’t line up and the recorded lines aren’t very accurate.  I repeated this experiment a few more times over a couple of days, just to make sure I didn’t bump the device or accidentally move it the first time out, and judging by the similar results, that wasn’t the case.  Even with only using one layer, the accuracy had noticeable issues.  Having imported the Inkling sketches into both Photoshop and Illustrator, I can verify that bringing the sketch and layers into both programs works as advertised.  It was a smooth import and looked the same as it did in the Inkling Sketch Manager, layers intact.  The problem seems to be in the capture itself.

In an effort to be fair, my expectations for the Inkling were pretty high, and I think the disappointment lies primarily with that.  I was expecting the same level of accuracy I get from an Intuos tablet.  If you look at the Wacom site, it says that the Inkling is  “Designed for rough concepting and creative brainstorming, Inkling is ideal for the front end of the creative process. Later, refine your work on your computer using an Intuos4 tablet or Cintiq interactive pen display.”

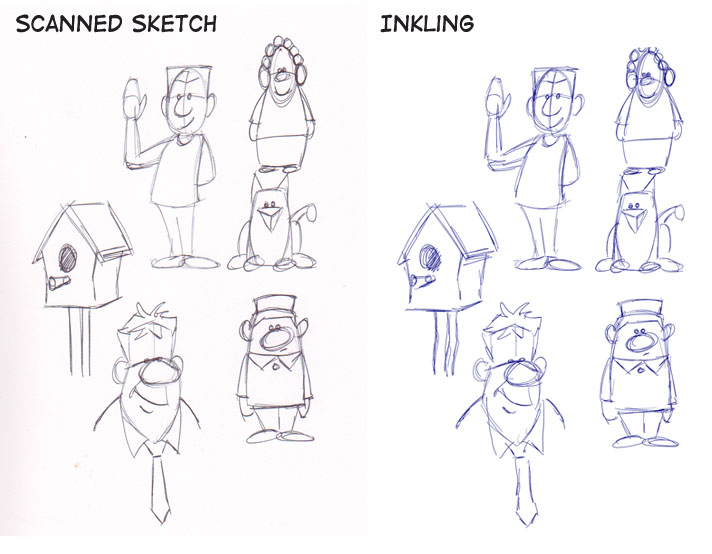
Using this device for solely that purpose, it works as advertised.  I did a page of rough sketches using the pen alone, the results you can see here.

If you weren’t being a stickler for accuracy and comparing it to the original sketch line by line, the Inkling does what it was designed to do.  For rough sketches and concept ideas, to simply record something you can throw into your laptop and email to a client or collaborator, it works just fine.  It just wouldn’t do what I wanted it to do, which basically was to replace my scanner.  I know a number of other artists that were hoping for the same thing, and for this purpose, the Inkling is not the right tool.

When it comes to creative tools, the goal should be to find ones that will make your life better and fill a need.  When it comes to the Inkling and my own personal workflow, I find myself struggling to invent a use for it, in order to justify having it.  Unfortunately, I can’t.  When I import a drawing into Photoshop, I need it to be clean, and I will rarely have any use for a rough unfinished sketch like the ones you see above.  Will this device be useful to others?  Yes, I’m sure that it will, but it’s not for me.


Posted on 2 Comments

The upside of 2011

Bighorn Sheep TotemAll things considered, 2011 was a great year.  While every year will have it’s challenges, I’ve been fortunate that I’m honestly able to see each year of the past decade as having continual forward momentum.  The work I’m doing is far beyond what I had hoped for when I first started in this profession and I’m very grateful for it.

I became nationally syndicated in September of 2001, sending cartoons out across Canada each week, and got very few bites.  For two years, I had no more than three newspapers, paying the bare minimum rate, and I will admit to almost giving up on it more than a few times.  With a full-time job to pay the bills, I had to get up at 5:00am each morning to get a cartoon out before I went to work.  When I came home, I had to sketch in the evening and work on the weekends in order to manage it all.  Finally I started making progress, got a few more papers, took advantage of other opportunities, and about six years ago, I was able to leave my job and play this game full-time.

Through it all was my ever supportive wife, Shonna, and I’m incredibly grateful that she never told me not to do any of this.  The only caveat given when I went full-time was that if I couldn’t pay my half of the mortgage and bills, I had to go back to work.  Canmore is an expensive place to live and we couldn’t do it on one income.  Fortunately, it never came to that, and each year has been better than the one before.  At the time, it was an incredible struggle, but in retrospect, I’m glad I had to go through it because it makes the present all that much sweeter.

If my 2001 self could see the work I’m doing now, he’d be pleasantly surprised, and I try to think about that when I’m having a bad day or feeling sorry for myself because of a heavy workload or when money is tight.  So far, I’ve not only gotten what I wanted, I’ve gotten much more.  Best of all, I discovered that I loved getting up at 5:00am to work, I still sketch in the evenings, and being self-employed means you often work weekends anyway, so I was already used to the routine.  Now, I can’t imagine doing anything else.

Here’s a recap of my professional highlights of this past year, some of which I’d forgotten about until I went back through the blog entries month by month.
iPad Painting: Started playing around with this in January, and damn if it hasn’t been a lot of fun figuring it all out.  Ended up trying four different styli and half a dozen apps.  It would seem that I’ve finally settled on the Wacom Bamboo Stylus, the Nomad minibrush, and the procreate app.  The combination of those three gives me the best results, and while I don’t consider anything I paint on the iPad to be finished work, I would go so far as to call it advanced sketching, and I plan to keep doing it.
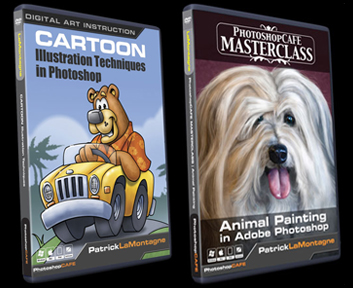
PhotoshopCAFE DVDs:  In March, I finished my first DVD, called Cartoon Illustration Techniques in Photoshop.  Easily one of the most difficult projects I’ve ever worked on.  Having only done a little bit of sound and video editing for a failed Flash animation project a few years back, it was a struggle.  But I finished it, it went into production, and is selling well.  I’ve heard from many who bought the DVD that have learned a lot from it and complimented me on my instruction, so I’m guessing I didn’t do so bad a job.

The second DVD, Animal Painting in Adobe Photoshop, was a lot easier and a lot more enjoyable as I wasn’t teaching raw Photoshop beginners.  It was more about the painting than the software and while it was a challenge, the difficulty I went through with the first DVD paid off while recording the second as there were few problems I hadn’t already solved.  Recording one DVD this year would have been enough of a milestone, but I never expected to record two, and to be very pleased with both of them.
Cartoon Ink: While my old website was ‘fine,’ it had become difficult to use and it was no longer the image I wanted to project.  While I had always done my own website in the past, this time I realized one of the most important business practices that so many have learned before me.  Hire professionals to do their job, so you can focus on doing yours.  With that in mind, I hired Erik Bernskiold of XLD Studios in Sweden to create a new website for me.  I knew Erik’s work and know him personally, so I was confident he would deliver much more than I could create myself.  With the help of Elizabeth Gast at Design by Firgs, another colleague and good friend who consulted on the site, and created an improved evolution of my logo, I was very pleased with the final logo and website and would highly recommend both of their work.  The time I saved was well worth the money spent and reduced stress.
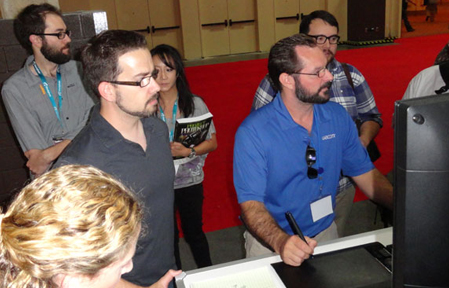
Wacom: I began to form a relationship with the great folks at Wacom at Photoshop World in 2010 after I won the Guru Awards for two of my Totem paintings and I couldn’t be happier about it.  Having used their tablets since the late 90’s, you won’t find a bigger fan, so I’m very pleased to be working with them from time to time.

Over the course of the year, I’ve been featured in the Wacom eNews, have represented the company and demonstrated their products at one of Scott Kelby’s seminars in Calgary, and have been a featured guest on two of their one-hour Wacom webinars.  The people I’ve worked with at Wacom have been incredibly supportive and are absolute pros at what they do and I look forward to a continuing relationship with them.

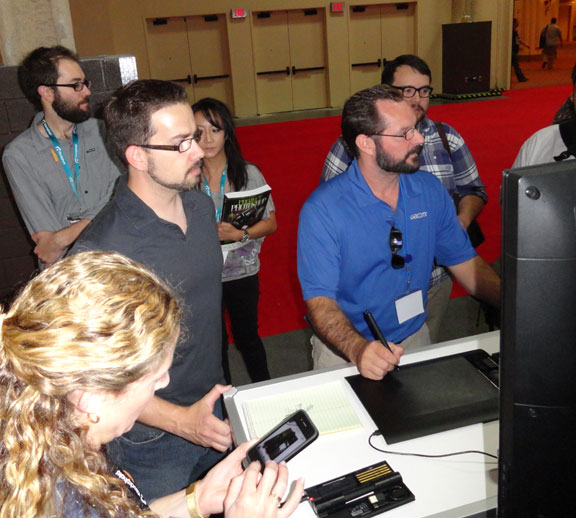
The photo shown here is Joe Sliger demonstrating the new Wacom Inkling for me at Photoshop World this year.  He is also one of the moderators of the webinars.

Island Art Publishers: In July of this year, I began a licensing deal for some of my Totem paintings to be produced on art cards.  These are distributed throughout Western Canada and the northwestern U.S. and time will tell whether this arrangement bears any fruit.  An artist friend once told me that art cards are often your best advertising, because not only does the person buying it see your work, but so does the person receiving it.  You may not make much money early on, but it’s enough to get your work out there to a market that otherwise might not see it.  And the cards look really good.
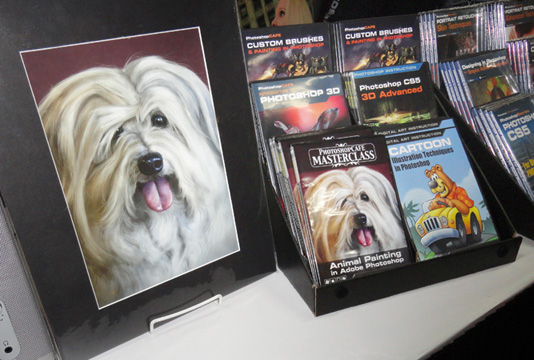
Photoshop World: While it’s true that I didn’t learn much about technique or improving my work at this year’s Photoshop World in Las Vegas, I still think it was worth attending because of the networking opportunities.  Having recorded two DVDs for PhotoshopCAFE, it was great to finally meet the owner of the company in person, and see their operation on the Expo Floor.  I was able to meet a few more of the Wacom folks in person, and talk with other industry professionals I otherwise might not have had the opportunity to talk to.  Online interaction is fine, but it doesn’t compare with face-to-face conversations.  So while I won’t be going back as an attendee, I still think this year’s trip was well worth it.

knmadventuresAt the time, I was doing some illustration work for wildlife photographer and instructor, Moose Peterson as well, and being able to go over sketches with him in person was a real treat, as most of the time this would have all been done online.  The other benefit of the Photoshop World conference is that I get to meet with so many talented photographers, many of whom I consider close friends.  For somebody who relies on great photo reference for my painted work, their skills and talent are often one of my most valuable resources, not to mention their generosity with their work, and the support they offer for mine.

Paintings: Saved the best for last.  I am so very pleased with the progress I’ve made on my painted work this year.  The first half of the year, I was so busy with the DVDs and other work that I only painted one animal in my Totem series, the Great Horned Owl.  When I realized this in the latter half of the summer, I was ticked off.  The work I love to do most, I had placed in last priority.  In retrospect, however, I’m glad it happened because when I realized it, I vowed it would never happen again and it stoked the fire.  The end result is that from September to December, I’ve painted a number of new images and I feel they are my best work to date.
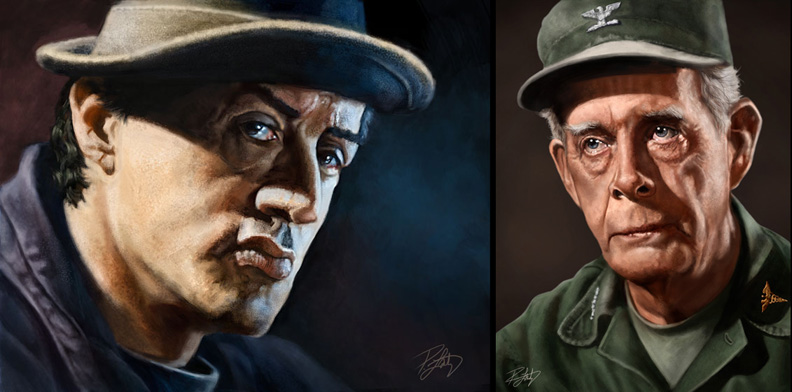
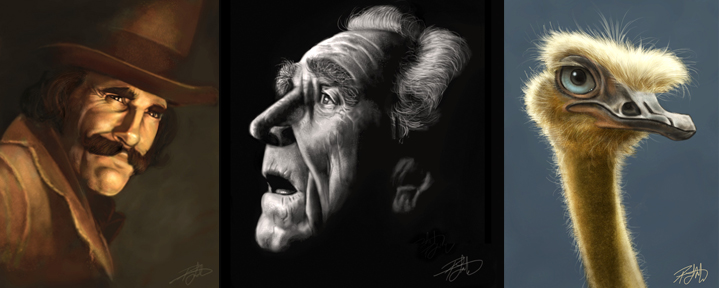
I had been becoming bored with painted caricatures of people in the past couple of years, but recently, I’ve realized that it wasn’t people I was bored with painting, just caricatures of them.  Beginning with a couple of iPad paintings, I’ve discovered how very much I enjoy painting portraits, and I’ve done a couple of pieces recently that I’ve really enjoyed.  Inspired by the work of Drew Struzan and others, I think I’ll be painting a lot more portraits of people, if nothing more than for the sheer enjoyment of it.  While style is always evolving, I think my paintings now have a definitive look that is mine, whether it’s people or animals, and it’s one I want to continue to develop and refine.
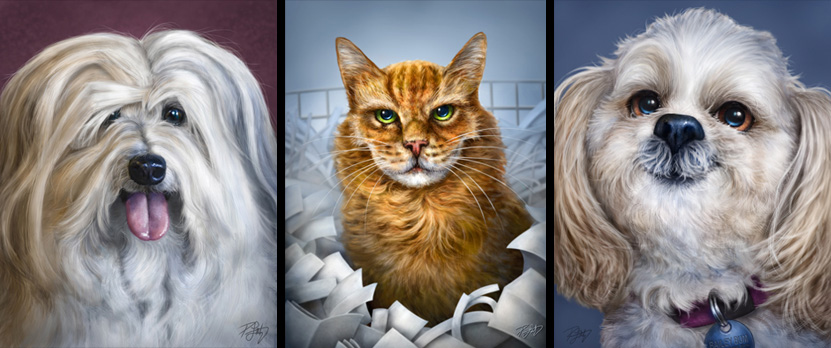
I’m now getting commissions to paint pet portraits and caricature this year, and it’s really enjoyable work.  The painting of Don Diego that I did for my DVD, the memorial to Titus the cat, and to being able to finally create a real painting for my folks of their dog, Bailey, it’s looking like this could be a big part of my work in the coming years.  Working on another commission at the moment, and having fun with it.

My real passion, however, is still the Animal Totems.  Nothing I’ve ever done in my career has filled me with as much joy as that I get from painting these whimsical caricatures of wildlife.  Not only are they fun to work on, but they sell well in the galleries which means others like them, too.  I’ve been fortunate that a number of wildlife photographers I know have been willing to sell me the license rights to use their photos as reference, or have enjoyed my work enough to want to trade me the use of their images for canvas prints of the painting when it’s done, both of which I’m more than willing to do.

Humpback Whale TotemEach of them is my favorite for different reasons, but the one I was most happy with this year was the Humpback Whale Totem.  I don’t know if it’s because I’ve wanted to paint it for so long or that it was such a challenge to paint an animal with no fur or hair, and the end result lived up to my expectations.  Either way, these paintings are the only work I’ve ever done that I still enjoy months and even a year after I’ve painted one.  That alone tells me this is the work I’m meant to do, at least for now.

As you can see, I’ve had a very good year, and I’m grateful for it.  For all of you that follow my work, your messages of support here on the blog, through social media, and email are all appreciated.  It’s a solitary existence, this freelance lifestyle, and it’s nice to know that others are getting enjoyment out of the work I do.  And if you’re struggling with your own creative endeavors, whether you’ve just begun or are just trying to keep going, I would urge you not to give up.  It may not seem like it in the moment, but I assure you, if it’s something you love to do, it’s worth the effort.

Posted on 2 Comments

Time and Tide

Over the past four or five years, I’ve spent a great deal of time learning all I can, working to improve my skills, attending conferences, webinars, and even taking a couple of online courses.  This year, I’ve realized that there isn’t as much out there for me when it comes to education.  Yes, there will always be better artists to learn from, but many of them aren’t lecturing at conferences or teaching courses specific enough to warrant the expense.

I wrote recently that I wouldn’t be attending Photoshop World again next year,  so I considered attending the ICON illustration conference.  I’ve read good reviews, but it doesn’t feel like the right thing to do at the moment.  Earlier this year, I had decided not to attend the Association of Canadian Editorial Cartoonists conference next summer in Montreal, because even though there are people I would like to see, it really isn’t a conference about learning.  I can’t justify the expense for three or four days just to hang out and talk shop.  I realize Montreal is a beautiful city, but my wife and I have other vacation plans for 2012.

One decision I’ve now made for the next year is that unless I’m working or speaking at one, I’m not going to be attending any conferences.

With the success of my animal paintings and the fact that I enjoy them so much, it is very clear that I’ve finally found my niche.  This is the work I’m supposed to be doing and it’s a great feeling to have absolutely no doubt about that.  While I still enjoy drawing cartoons and painting people, painting animals is where I find the most fulfillment.

It is gratifying that my work has a growing following.  The paintings are doing well in both Two Wolves in Canmore and the About Canada Gallery in Banff, I’ve signed my first licensing deal with Island Art Publishers, and I’m beginning to get commissions that are a lot of fun to work on.  While I’m fortunate to enjoy most of the work I’ve been doing the past decade, I’ve never enjoyed it more than when I’m painting.

With a couple of DVDs under my belt, my second webinar for Wacom in a few weeks and some knocks on the door from other companies, it has become clear that I’ve stepped well into the realm of teaching, which is often a logical step for many students to take.  While I still intend to keep learning as much as I can, I’ve found that I’m finally comfortable passing on some of the skills I’ve learned, and I’m enjoying it, too.

But, where to go from here?  It’s a question faced by every freelancer, entrepreneur, and self-employed person and one you end up asking yourself over and over at different stages in any career.  Sure, there are many people who have done it before, some of them poorly and others with monumental success, and while their advice and example can aid in the big decisions, the choices still rest with each individual, and with how much each person is willing to risk.

For most of this past year, I was so focused on the DVDs for PhotoshopCAFE and other commission work, that I added only one painting to my Totem series, which was the Great Horned Owl.  Only one.  When I realized that this summer, I don’t mind saying that I wasn’t pleased.  The one thing I love to do more than anything in my work, and it turned out that I made it the lowest priority.  Obviously, I dropped the ball on that.

For the next year, my main focus will be these paintings.  Not just working on them, but promoting and selling them.  I’ve still got other commission work that I’ll be doing, and another DVD in the works for PhotoshopCAFE, but the main priority will be the work I love to do most.

There can often be a number of ‘right’ choices, and because of this, many people will succumb to the paralysis of making no choice at all.  This is the surest way to stall any progress in a freelance career.  Moving forward has always required taking risks, and part of that risk is making bold decisions without knowing how they’ll turn out.  So rather than play a game of wait and see, I’m going to gamble on success.

With that in mind, I’ve decided to get a Small Press booth at the Calgary Comic and Entertainment Expo at the end of April.  Between now and then, I’ll be preparing promotional material, designing and purchasing a large banner and hardware for the booth, figuring out which varieties of prints to sell, and doing as much research as possible to make sure I put my best foot forward.  This will involve a significant expense, but as the old cliché goes, ‘you have to spend money to make money.’

30,000 people went through the doors last year, so I figure it will be a good place to get my trade show feet wet. I’ll be painting live at the booth all weekend, in addition to selling prints and my DVDs.  I have to figure out how many of each I’ll need.  I could bring way too much and go home with a lot of inventory or fail to bring enough and sell out on Day 2.  It’s a gamble because I don’t know how popular my work will be with the attendees, but there’s only one way to find out.

Either way,  I know that I’m going to learn a lot from the experience, and I won’t be standing still.

Posted on 2 Comments

Painting, Projects, and Promotion

As I’m not a fan of the holiday season, I’ll tend to keep to myself over the next couple of months.  With that in mind, I plan to keep busy with paintings and other projects and I’ve made sure that I’ve got plenty on the go, including a number of paintings.

One project I’ve planned is creating a short promotional video of my painted work.  Not sure how I’ll use it, but I still think it’ll be a fun challenge.  Basically, it’ll be a video commercial for one of my animal paintings, which translates to all of my paintings.

I recently acquired the license for four reference images for wildlife paintings and while I’m looking forward to working on all of them, there is one in particular that has me excited.  The image is very clear in my mind, and the photo I have to work from is incredible in its detail.  With that in mind, I’m going to create a 2.5 minute video of the whole painting process, from start to finish.  Most of the painting will be sped up quite a bit, but there will be sections from the entire process included in the video, sketches to finished work.

This video you see here is a test, using the bighorn sheep painting that I’m currently working on.  You have to look closely to see some of the brushwork that I’m doing in the video, something I’ll do better in the future piece.  This is about 20 minutes of painting, sped up to be around 2 minutes in the video.  I bought the royalty-free piece of music yesterday, and while the license cost more than three CDs, you have to pay for quality and it’s not like I’ll be doing this on a regular basis.

I’m a big fan of movie-making and movies in general, and there’s a lot added by an appropriate piece of music.  This one is fine for the bighorn sheep painting, but it’s a perfect fit for the actual painting and animal I’m planning to use it for.  In this video, you don’t get to see the whole painting, and that’s intentional, because it’ll be done this week and I don’t want to show it too early.  The real detail has yet to be painted.

This was a learning process, but not as difficult as I thought it would be.  Some of the things I’ve got planned for the next one will be complicated with the software I have, but figuring that out will be part of the fun.

Posted on 1 Comment

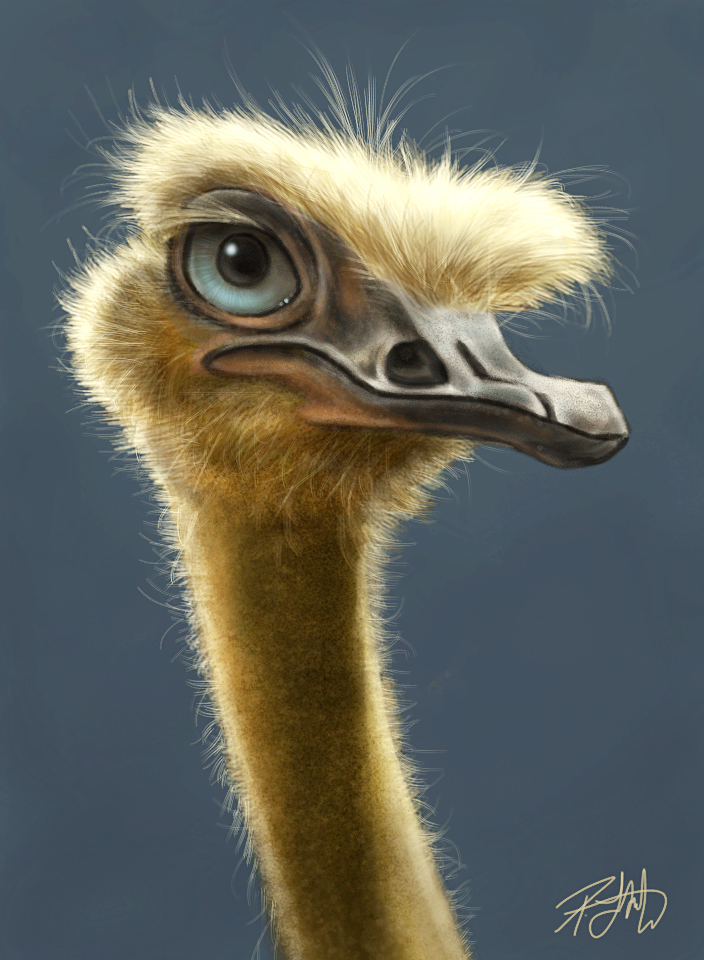
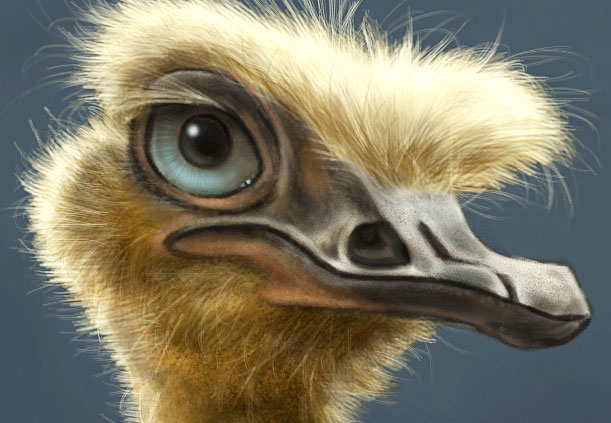
Ostrich – iPad Painting

Here’s another painting I did on the iPad over a period of three or four days.  This is the kind of thing I like to do while sitting watching TV, as it’s not on deadline and is just fun to work on.

This was painted using the Procreate app, the Wacom Bamboo Stylus and the Nomad mini brush, which arrived last week.  While I’m very happy with the Wacom, I’ve been seeing ads and reviews for the Nomad brush around the net and I thought I’d give it a try.  Because I like having everything portable, I bought the mini brush instead of the longer ones and I really enjoyed working with it.  It doesn’t really do anything I can’t do with the Wacom stylus, but when it came to working on the little hairs and some subtle shading, it was more enjoyable to work with as it glides over the screen a lot easier than a traditional stylus.

I wouldn’t want to be limited to only the Nomad brush, however.  While it’s great for painting, I don’t like it for drawing, but then, it’s not really designed for that anyway.  After finishing this painting using the Wacom and the Nomad, I’m going to continue to use them both.  They each have their strengths and I enjoyed using them both on this painting.  The only downside of the brush is that you want to be careful not to squash or wreck the bristles by leaving it lying around.  I was thinking that a little cap would have been a good thing to include with this brush/stylus.  But then again, I’d probably lose the cap, so it’s probably fine the way it is.

When I’m using the iPad, I have the brightness set to 50 percent.  Because I spend so much time in front of the computer, the brightness of my desktop monitor is set pretty low as well.  I plan to preserve my eyesight as long as possible, so I try to minimize my exposure to bright light.  The downside of working on the iPad is that it means making adjustments for that before posting.  There are a few apps out there that will make color and brightness adjustments but I’m still getting used to how far I have to push things to get them to look right online.  It’s an ongoing process, but I’m learning.

This close-up is actual pixels, 72 ppi, so you can see that this is one of the limitations of working on the iPad.  I have the first generation iPad, and I know the 2nd generation has better resolution, so you’ll be able to get a little more detail, but not a lot more.

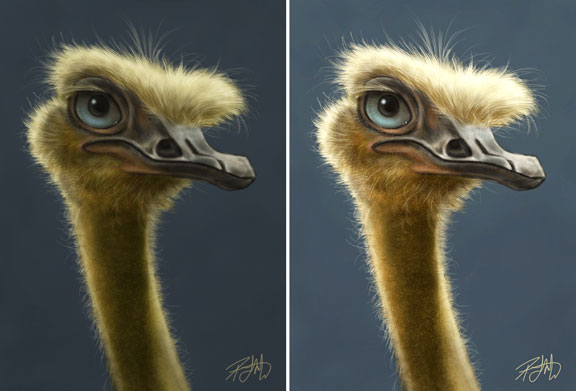
So, in the interest of full disclosure, I did bring this into Photoshop for some color adjustment.  Every monitor is going to be different, but mine is calibrated and the color I saw on the iPad is not what it looked like when I emailed it to myself in order to post it.  So while all of the brush work was done on the iPad, I did do a Hue/Saturation and Levels adjustment on my desktop.  I also used a bit of Smart Sharpen.  Here, you can see the difference side by side.  While the one on the left is what I got from the iPad in my inbox, the one of the right (after adjustments) more closely resembles what I was seeing on the iPad when I was working on it.

The iPad will not replace my Wacom tablet and Photoshop anytime soon, so you might wonder why I bother.  It really is just for the fun and the challenge of it.  I’m enjoying seeing just how far I can take a painting before I can’t go any further.  This is equivalent to painting in low-res in Photoshop and that translates directly to my more detailed paintings because they all start in low-res.  Working on the iPad with limited tools and resolution does end up making my more detailed work better because it forces me to do my best on the foundation of the painting before working on the fine details.

While I intended this to end at being an iPad painting, I’m toying with the idea of bringing it into Photoshop, bumping up the resolution and making a full size, full resolution painting out of it, because I know I can take it further.  It’ll mean working a number of more hours on it, but I think the end result might be something I’ll be proud of.

Posted on Leave a comment

Wired for Wacom

If the name Wacom means nothing to you, we’ve likely never met, you’re not a digital artist, or you landed on this blog entry by accident.

I’ve been using Wacom tablets since the late 90’s.  It’s true that you’ll occasionally hear stories in chat rooms about other tablets, but much like the Sasquatch or the Loch Ness Monster, I’ve never met anybody who’s actually seen one.  Wacom is by far, the industry standard.

My first tablet was a first generation 4″ X 5″ Intuos and I used that for many years.  While I replaced the pen nibs a few times, and the transparent overlay at least twice, the tablet never gave up.  The only reason I replaced it was that it had a nine-pin connector, and my new computer did not.  Over the years, I’ve had a small Graphire, an Intuos and Intuos 2, and I currently own a medium Intuos 4, a small Intuos 4, and a Cintiq 12wx.  Add to that a Bamboo Stylus for my iPad, and my plans to buy a Wacom Inkling, and it’s obvious I’m a fan.

I’ve been fortunate to form a relationship with the company over the past year, and have been pleased to meet a number of great people from Wacom.  In the Spring, I was asked if I’d like to demo for Wacom at Scott Kelby’s ‘Light It, Shoot It, Retouch It’ tour when it came to Calgary in July.  It was a great experience, one I’m eager to repeat if the opportunity shows up again.  Not only did I get to see what it was like to be on the ‘other side’ of an event like that, but I was able to remove the fear of new technology for a few people.  These devices aren’t difficult, they’re a lot of fun, and often it just takes sitting down with somebody, and putting the pen in their hand to get them to realize it.

An added bonus of demoing for them was having every tablet Wacom makes show up at my front door a week before the show.  It was like winning the lottery for this digital painting art geek, until they insisted I send them all back once the show was done.  How is that fair?

Wacom recently announced their Inkling device, and rather than a clunky explanation from me, watch the video and you’ll get the idea.

When it was launched, I started getting emails and Facebook messages from friends and colleagues who insisted I give more details on what it’s like to use it.  Let me tell you what I told them.  I found out about the Inkling when the rest of the world did.  I was not a beta tester, and had no idea it was even being planned.  Wacom, like any smart tech company these days, doesn’t talk about products in development and is very good at keeping secrets.  Doing a demo for Wacom does not give you access to the vault.

But since it was launched just days before Photoshop World, I was really looking forward to putting it through its paces on the Expo Floor.   The staff at the Wacom booth were being pestered about it on Day 1 (hey, they did it to themselves!), but they didn’t have one available to try right away as they  had just received them and they needed to charge before releasing them to a lineup of eager testers.

I did not get to put the Inkling through its paces.  There were far too many people wanting to try it, so I got about two minutes with the device.  But Joe (patient, patient Joe) demonstrated the process, workflow and explained the pen and device quite well.  Bottom line, I will be buying one when it’s available in October, and I’ll be sure to provide further details after I’ve given it a good trial.

Wacom also announced their new 24″ HD Cintiq this week.  This thing looks beautiful and if I had the spare $2500 lying around, I just might get one.  But I’ve made no secret that my lack of traditional art training makes the Cintiq a ‘nice to have’ for me, but not a ‘must have’.  As much as I like painting and doing live demos on the Cintiq 12wx, I do the majority of my day to day work on the medium Intuos4.  I just prefer to see my whole screen without my arm in the way.

Finally, I was pleased to be asked to be a guest on Wacom’s webinar series this week.  While I will admit to being a little nervous about the whole thing, I relaxed into it quite quickly and had a lot of fun.  Wes and Joe (yes, the same patient Joe) were great to work with, and encouraged me to keep it light and casual, which is right in my wheelhouse.  The hour flew by and I would welcome the opportunity to do something similar in the future.

Thanks to so many of you that commented on Facebook, Twitter and email afterward, letting me know that you enjoyed it.  A few of you even apparently learned something, which is always a nice bonus.

It really is a thrill for me to be working for and with Wacom once in awhile, because it’s so easy for me to pitch and endorse their products.  People will often ask me if they need a Wacom tablet to do the type of work I do.  Most of the time it’s because they’re trying to avoid making the financial investment, even though they’re very affordable.

The answer, is an unconditional YES.  To paint digitally or do almost any type of creative artwork in Photoshop or Painter, you NEED a Wacom tablet.  Just as an oil, acrylic or watercolor painter needs to spend money on canvas, brushes and paint, a digital painter needs to spend money on the necessary tools as well.  A Wacom tablet is absolutely one of those necessary tools.

If you’d like to catch a replay of the webinar that was live earlier in the week, here it is, available on YouTube.