Posted on 6 Comments

Whimsical Wildlife NFTs

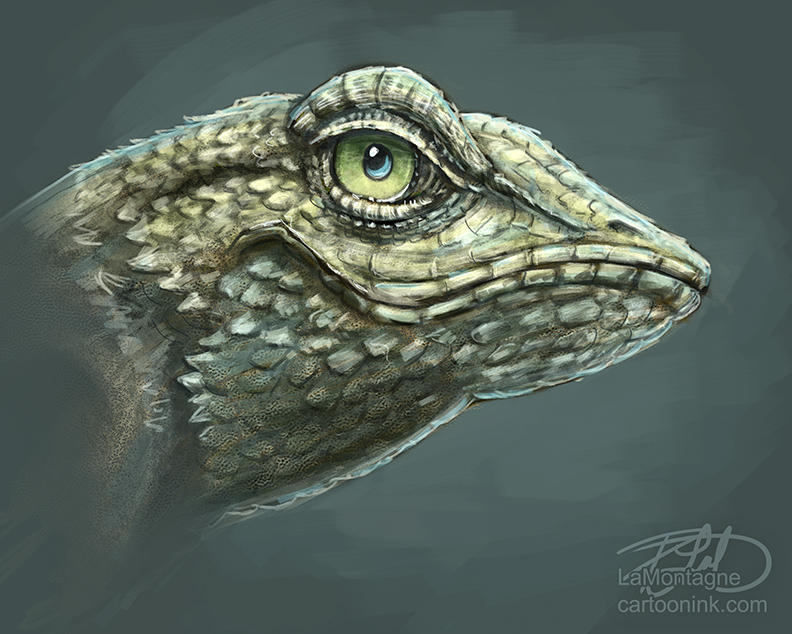
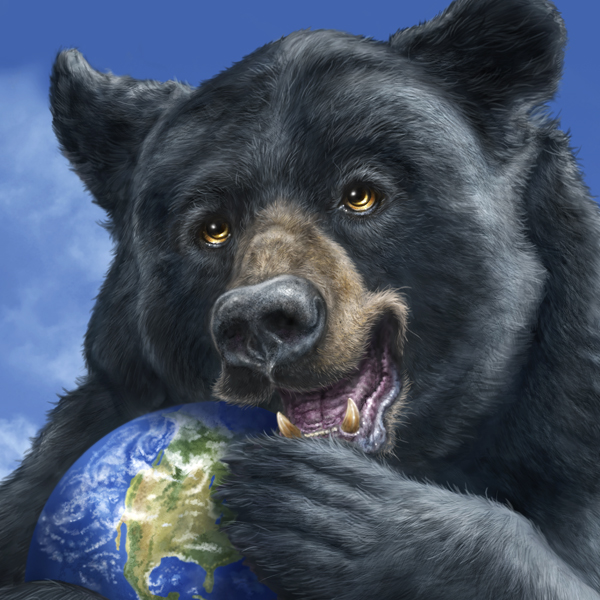
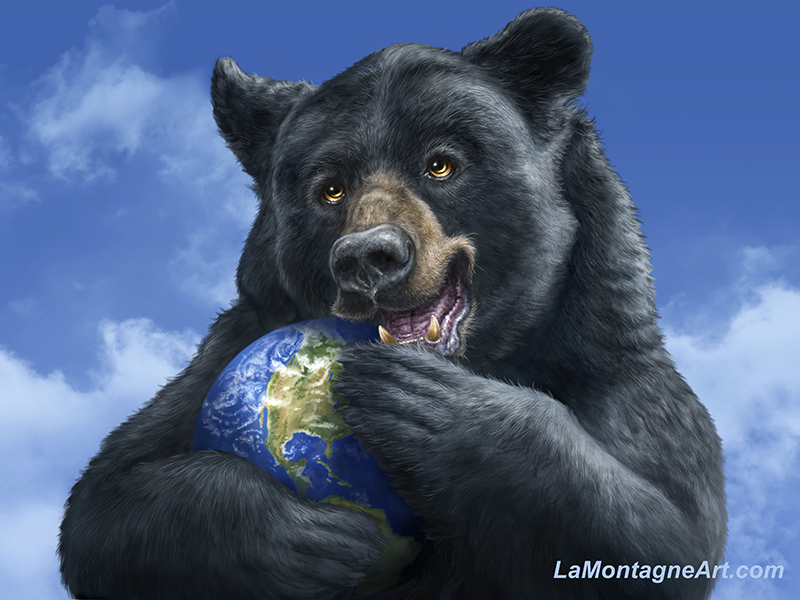
I’ve recently signed with two different NFT marketplaces, minting a selection of my whimsical wildlife paintings. They’re both launching in locked BETA in the next week or two, which kind of makes them members-only clubs, for the time being, so with nothing to link to, you’ll have to take my word for it.

I won’t get super-technical, but this does require a little unpacking. The average person has a problem understanding NFTs, cryptocurrencies and the blockchain because some of the people explaining it speak a language the rest of us don’t.

I’ve been drawing and painting digitally in Photoshop since the late 90s. With other digital artists, I can talk about Adjustment Layers, Blend Modes, Histograms, Paths, and Color Spaces, all standard terms in Photoshop, but geek-speak to anyone unfamiliar with the software.

The language of the Cryptosphere is no different. But just as you don’t need to know how the internet works to use it, the average person doesn’t need to know everything about NFTs to understand them.

NFTs are digital originals; they can be images, music, gifs, videos, documents and more. These assets are traded on a blockchain, a digital ledger of events and transactions using tokens and coins. The T in NFT stands for token.

Somebody more blockchain savvy than I might add “well yeah, sort of, but…” before elaborating on my explanation to make it more specific and accurate, but you get the idea.

My understanding is that when I mint one of my digital paintings, the code within the NFT certifies it ‘an original’ in the Cryptosphere. The verification process renders it unchangeable due to a gauntlet of checks and balances with computers from all over the world, all of which must agree that this is the original.

But, I can save 1000 copies of the same digital painting, all identical and indistinguishable from the original piece, so why is one more valued than the rest?

Because it’s the original, or in some cases, one of a finite collection.

It’s the same concept as a numbered limited edition giclée. It could be an exact copy of an open edition print, but some collectors, especially in the last century, are willing to pay more for that number. For example, one first edition copy of Moby Dick recently sold for almost $50,000, even though I can read the same story in the paperback I bought from Amazon for $7.50.

As someone who doesn’t collect anything, I don’t covet first or limited editions, rare pieces of art, or an original Aliens script signed by James Cameron, even though I’m a big fan of that movie. But I shouldn’t need to explain that plenty of people love these things.

So, dismissing or judging NFT collectors simply because they’re interested in something new that many don’t understand is foolish. As much as I respect the genius of da Vinci, I just don’t get the hype surrounding the Mona Lisa or why it’s worth over 100 million dollars.

I do, however, think it’s a crime that Leonardo never saw a dime of that money.

Scarcity and rarity have value. They always have. To some people, but not all people.

However, if these rare things matter to you and your community, whether it’s sports, music, literature, comic books, archeology, art, or anything else, what others think shouldn’t matter.

The guy who paints his whole body in team colours, puts on the jersey and cheers himself hoarse for three hours at a game, surrounded by thousands of people like him, doesn’t waste his time worrying about the millions who couldn’t care less about the sport that gives him so much happiness.

After last year’s frenzied reporting around a few artists who scored big on NFT sales, I wrote a post about the pros and cons of NFTs, as I understood them. I saw the potential for artists but wasn’t rushing to create NFTs of my work at that time. One reason was the environmental impact.

NFTs have a well-earned reputation for consuming a lot of energy because of something called Proof of Work. Proof of Work requires a shit-ton (not a crypto term) of computers worldwide to talk to each other to verify that the code is legitimate.

Those computers run on electricity, so the process has a significant environmental footprint. Even though most of that traffic comes from verifying cryptocurrencies rather than NFTs, artists have been reluctant to sign up to be part of the problem.

In that first post, I wrote, “They’ll solve the blockchain energy problem, and it will become more affordable and less environmentally destructive.”

That’s happening right now.

Everything that must be verified by all those computers, that Proof of Work, is shifting to something called Proof of Stake. Other processes are called Proof of Residence, Proof of Randomness, and likely more I haven’t yet heard of. This should provide even more secure transactions and render the process more sophisticated and familiar. When cryptocurrencies adopt these other Proofing methods, the environmental impact of minting coins and NFTs will go from ecologically disastrous to environmentally friendly almost overnight.

Cryptocurrency investors are in it to make money. It’s the same reason traditionalists invest their pension funds and retirement savings in the stock market, which, as we have too recently seen, can be just as risky when bad actors rig the game.

Just ask somebody who lost their home or life savings in 2008. The current system only masquerades as secure, but we accept it out of familiarity.

We take comfort that our financial system is regulated, but it’s built on faith and belief. Cash is only paper or plastic, and our investments are just numbers in somebody else’s database. The stock market routinely veers wildly all over the road.

While cryptocurrencies are unlikely to replace the current banking system, they likely aren’t going away. Your traditional bank is investing in them, and the signs point to the integration of the two.

Regardless of where they keep them, everybody wants their investments to grow.

The people running cryptocurrencies realize that an environmentally friendly reputation is more attractive to investors, so it’s in their best interest to develop more energy-efficient methods and operation models. Revised Proofing is just the first step. The environmental impact of minting cryptocurrencies and NFTs will soon be a thing of the past.

Another reason I’m getting involved is the emergence of more sophisticated NFT art marketplaces created and operated by business professionals. Some are treating these marketplaces like professional galleries, curating their collections. Artists are vetted, approved, and recruited for inclusion based on their work quality, reputations, and experience.

There was already a large NFT marketplace called OpenSea. The problem with OpenSea is that anybody can mint anything and call it an NFT, put it on the platform, and it becomes one big tasteless soup. A professional artist with years of experience, an established niche and audience can create an NFT of a piece of her art and upload it to OpenSea. Two seconds later, her work is on Page 45 of today’s offerings because somebody uploaded a collection of 1000 poop emojis wearing different hats.

It would be like walking into a gallery looking for beautiful art but having to dig through millions of finger paintings, crayon scribbles and post-it note doodles to find it.

So, when my buddy Derek Turcotte told me a new type of NFT marketplace contacted him, and he gave me some of the details, I was intrigued. I researched the project and the people involved and saw the potential. Shortly after that, Derek suggested another marketplace I found even more appealing.

One was big on hype and promotion but backed by experienced operators in the crypto world. They didn’t have it all spelled out like I was used to, but I didn’t see it as nefarious, just a different culture that operates a lot more casually. I considered the risks vs. rewards and still felt it was a good bet. And yes, the word bet is appropriate because all of this is new and speculative.

However, the second platform was more like dealing with a real-world licensing opportunity. After an actual phone call from the company in the U.S., where I was free to ask plenty of questions, I agreed to give it a shot. I received a professional legal agreement, names, emails, and phone numbers of people assigned to help me navigate the process. I uploaded my initial images to a professional site, and now I’m waiting for the launch.

What the first platform could learn from the second is that if you want professional artists to mint NFTs and participate in this world, you must learn to talk to them in the language they speak. Artists who do this for a living are used to dealing with companies, galleries, and markets, and you won’t earn their trust if you speak to them like gaming crypto-bros.

Just as amateur artists must learn business language to become professionals, companies must learn how to speak to artists if they want them to climb aboard.

From talking to these NFT marketplaces in recent weeks, there are two stark differences between the crypto world and the traditional business art world.

In the real world, for lack of a better term, galleries, licenses, and retailers will try to get artists to sign exclusivity contracts, especially in smaller regions. So if your work is sold in a gallery, you can’t sell it in another one nearby, sometimes even in the same town or city.

When I asked the NFT markets about this, each waved it off. The only exclusivity required is that you can’t sell the same NFT on more than one marketplace. That’s more about logistics and reputation than anything else. An NFT is essentially a certified original. If two people bought the same original simultaneously from two different marketplaces, it would erode any confidence in the parties involved.

The second thing is that the NFT market seems to value quality artwork more than the real world, as far as pricing goes. These collectors understand the value, scarcity, and provenance of a piece of NFT art and that it has more value than a print.

In the real world, I paint custom commissions for clients, as original a piece as you’re ever going to find. And yet, I get push-back on the price all the time from people who want my best work, but at garage sale prices. Some of my first NFTs are priced higher than my custom commission rate, because they will be originals in that space.

Finally, the crypto community has been the most impressive surprise in this whole experience. True, you can find sinister characters everywhere, but my interaction with these people so far has been positive.

After receiving an out-of-the-blue invite to learn more about this world, I spent an hour in an online phone call with five other people from different parts of the U.S. I admitted my ignorance about much of this. While one guy laughed and said, “wow, you’re just a baby,” he followed it up with, “hey, we’ve all been there.”

Although they were all experienced crypto investors, he cautioned that cryptocurrency and NFTs could very well be a recurrence of the dot-com bubble of internet start-ups in the late nineties. Many of these cryptocurrencies and speculative ventures have already failed, and more of them will, just like plenty of businesses in the real world.

Great reward doesn’t exist without risk. But, if you’re aware of that risk and do your best to mitigate it, you can approach it with open eyes, hoping for the best but ready for a possible rug-pull.

An important caveat here; the only reason the first guy reached out was my friend, Derek. It is very much who you know and who vouches for you that gets you invited into these discussions. If you’re associated with good people online or in the real world, that goes a long way to establishing trust. And if somebody asks, “who’s this guy?” then the answer will most likely be, “this is Patrick; he’s a friend of so-and-so.”

I asked one of these guys why somebody hasn’t created a course for artists to help them navigate this new frontier. He said there are some introductory courses, but everything changes so fast. The only way to keep up is to do the reading, join discussions, and get involved.

Community is essential in this world, which means I will have to be more social in some of these forums, something I have avoided in recent years. Thankfully, there are rules established in these communication spaces. They all have moderators, and a common theme seems to be, “don’t be a dick.”

If only other more popular platforms could adopt the same policy.

I’m excited to wade into these waters. True, I have risked some of my artwork, but none of my best sellers yet. These platforms need to earn that trust. Professional artists take risks with their work the first time they sell a high-quality print or canvas in a gallery. All it takes is somebody with the right equipment to scan the work and sell it to somebody else as their own. It happens every minute of every day all over the world.

Last month, I sent a cease-and-desist to a company in Australia. They were selling my Smiling Tiger image on a product. They took it down, but who knows if they just put it up on another site or how many other places are illegally selling my work? It’s a sad joke that artists know their work is good once people start stealing it. Unfortunately, theft is part of the trade, and good luck suing a company on the other side of the world.

Lately, there have been cases of automated bots scraping images from Twitter and art sharing communities like DeviantArt, stealing an artist’s work and minting NFTs from it. While most of these marketplaces will take down the counterfeits, finding the offence and reporting it takes a lot of time that most people don’t have. And if you do manage to get it taken down, ten more pop up in the meantime.

These curated marketplaces are working on that problem, too, with patents pending for better security software. Banks and credit card companies had to do it, and every corporation on the planet must constantly invest in security. The marketplaces that make it a priority will soon get that reputation. Word will spread, and consumers will learn that the NFTs you buy from Market A are often counterfeit, but those from Market B are vetted, verified, and support the rights of individual artists.

Which market would you trust, especially if you want to invest in value and growth?

It’s still the wild west, but the sheriffs and posses are multiplying, making it harder for the outlaws to roam the territory unimpeded.

There will undoubtedly be challenges, growing pains, and issues with this new venture. After record-breaking gains in 2021, cryptocurrencies across the board have experienced massive losses in these first weeks of 2022. While it will likely correct and recover, when (if?) that will happen is just best guess. Nobody really knows. As a financial investment, the crypto world is not for the faint of heart.

As a creative investing my art in the crypto world, it’s about the same as every other potential opportunity in art-for-a-living. You throw a bunch of stuff at the wall and see what sticks. This is no different.

I still have a lot to learn, but I’m more optimistic about the potential than early last year. I’m sure I’ll have more to say on the subject as these marketplaces launch and speculation becomes experience.

Cheers,
Patrick

Posted on Leave a comment

Bear Hug

It’s been a while since I’ve been able to focus on a whimsical wildlife painting. For those who follow my work specifically to see those, thank you for your patience.

Wacom hired me to create a video for them connected with a promotion they’re doing right now called “Find Your Gift.”

As many of you know, Wacom creates the tablets and displays on which I’ve created my work for more than twenty years. I’ve been their guest on webinars, created new product demo videos for them, represented them at an event in Calgary, presented at their booth at Photoshop World, and they generously allowed me to donate tablets to a local school.

My work wouldn’t be possible without Wacom.

So when my friend Pam asked me to create another video for them, there was only one answer.

What I like best about our relationship is that Pam lets me do my own thing. Of course, we have some back and forth to make sure my vision matches hers, but she knows what to expect from me, and I do my best to deliver.

In this case, I had the freedom to interpret the word gift and paint and write what I wanted, which allowed me to create my best work.

I spent the last three or four days chained to my desk, creating this painting, recording with the camera and screen capture, writing and recording the narration, and editing it all together a la Dr. Frankenstein. It was a lot of work, but I’m quite pleased with the result.

I realized that the three recent paintings I like best are ones I did for Wacom videos. Those include the Amur Tiger, the Ring-tailed Lemur and this one.

The model for this painting is one of the most handsome residents of Discovery Wildlife Park. Gruff was an orphaned black bear cub who had a rough start in life, but thanks to Serena and her staff’s tireless efforts, he has grown into a beautiful, gentle bear with a wonderful personality. The keepers try not to pick favourites, but they each have a special place in their heart for Gruff, as do I.

I’ve often written about how much I value my relationship with Discovery Wildlife Park. They allow me incredible access to the animals, for which I’m immeasurably grateful. On my most recent visit in September, I was able to sit inside the enclosure while they did their bear education presentation, where they teach people about bear safety, behaviour and conservation.

I took hundreds of reference shots and didn’t realize I’d be using ones from that session so soon.

One of the keepers, Jacob, was in Canmore last week, and I had a brief visit with him. I told him what I was painting, inspired by the poses I shot. He told me that Gruff almost always has a ball with him. It doesn’t need to be the same ball, but it’s kind of like his security blanket. He even takes a ball with him into his den when he hibernates.

On one visit to the park a couple of years ago, Serena sent me a text asking where I was. I said that I was watching a silly bear play with a ball. She responded, “Gruff.”

Gruff taught himself how to pose with the ball and because it was so endearing, the keepers used positive reinforcement to encourage that behaviour. It was this pose that inspired the painting. As the light wasn’t great in this shot, the sun beside and behind him, I had to use other reference photos for the details. Thankfully, I have hundreds of pictures of Gruff.

Even though I was pressed for time on this, more self-inflicted than not, this painting was a joy to create. It’s been a while since I’ve had this much fun painting one of my whimsical wildlife portraits. Considering the kind of year it’s been for all of us, that’s no small thing.

If you’ve got five minutes, you can see a high-speed time-lapse below of how I painted Gruff and hear some of my thoughts about the importance of finding and sharing your own gifts.

Take care of yourselves,
Patrick

___

© Patrick LaMontagne
Follow me on Instagram @LaMontagneArt
Sign up for my newsletter which features blog posts, new paintings and editorial cartoons, follow this link to the sign up form.

Posted on

Trudeau Update – A Cartoon Video

I recorded a high speed video of a cartoon I sent out this morning, some bonus content for my newspaper clients.

The type of cartoon in this video would normally take me about three or four hours since detailed caricatures are a lot more work. Add in camera setup, periodic recording throughout the process, sourcing and buying music, and editing, and I spent about nine hours on this yesterday, which is why I can’t do these as often as I’d like.

Because of the way I’ve set up my office, having a camera on a tripod over my left shoulder while recording is kind of clumsy. I can’t have it on the right, where there is a lot more room, because my hand would obscure the drawing. With a tripod leg right behind me, I have to be careful not to move my chair back and bump it. So there’s really no way to get into the groove of drawing while recording, at least not one that I’ve found.

I’ve tried recording with my phone or iPad on a goose-neck, since that setup is much more user friendly, but the problem is that even if you manually adjust the brightness, the cameras on portable devices just aren’t designed for recording the backlit display of another screen. I’ve even tried a GoPro camera, but none of them have worked as well as the DSLR camera you see here.

In the photo, you can see my second monitor, where I’ll often put the images I’m using for reference.

The display I’m drawing on is a Wacom Cintiq 24HD and the software is Photoshop, which is the most widely used professional illustration and digital drawing/painting software on the planet. There have been plenty of times I’ve wished it were called something else, because for many years, people assumed that if you were using Photoshop, you must simply be manipulating photos.

Thankfully, anybody younger than me has grown up with this technology, so I don’t have to explain it as often as I used to.

If you like the video below, feel free to share it from YouTube.

Cheers,
Patrick

© Patrick LaMontagne
Follow me on Instagram @LaMontagneArt
Sign up for my newsletter which features blog posts, new paintings and editorial cartoons, follow this link to the sign up form.

Posted on

Season’s Greetings – A Video


Every so often, I like to record a high speed ‘how it’s made’ video for a cartoon or a painting. I’d love to do more of these, but they’re time consuming.

With the over-the-shoulder view, the kind most people want to see, I used my Canon DSLR on a tripod for the best result. The challenge is that it needs to be close enough to capture the pen on the display, but back far enough so that I don’t bump into it with my shoulder or chair.

I’ve been drawing on Wacom tablets and displays for almost twenty years, so a lot of it is muscle memory. I go through the motions without thinking about the technology. As any artist in any medium can attest, once you’ve been using them for any length of time, the tools become extensions of your hands and arms. You think about the image you’re creating, not about the tools you’re using.

When I record the process, however, the tools are front of mind, which means the cartoon or painting takes longer. There’s really no flow to it and the process feels clunky.

When I’m painting, I can go for an hour without thinking about much else. When recording, I have to stop the camera after about ten minutes. Software is hardly perfect and by recording multiple short segments, it wouldn’t matter too much if I lost one. If I recorded all of it at once, however, that one file becomes a lot more precious.

I don’t record every brush stroke because it would be incredibly boring. I record ten minutes, shut the camera off, draw or paint for ten or twenty more minutes, then record again. There needs to be a big enough change between segments to keep the viewer’s interest.

Once I have enough from the camera, then I’ll often record some screen capture.  It’s no longer the display itself, but software in my computer recording what is happening on the screen. This doesn’t work all that well for painting detailed hair and fur because the cursor, brush and detail is so small, that it’s barely discernible to the viewer.

And again, incredibly boring.

Once I have all of the files recorded, from the camera and computer, I’ll bring them into my video editing software.

How I decided on the length of the video was the music I used as accompaniment. That isn’t always the case, but usual for cartoon videos. I can shorten visual segments, change the playback speed, and more easily mess with the footage than I can with the audio. This Christmas tune is around two minutes, which is a good length for a Youtube video, since our attention spans keep getting shorter.

I didn’t record the whole sketching process because I knew I’d have to mess about with the poses to get all three characters in, plus the talk bubbles.  That’s why you can see my tracing over my own sketch. While that would no doubt be of interest to the beginner or student, not so much for the average viewer.

These videos, it’s all about compromise for content.

For those interested in the tech part, I draw almost exclusively in Photoshop on a Wacom Cintiq 24HD. This recording, however, was done on a Wacom Cintiq 16 display, as they sent me one in August. I put it through its paces while painting my White/Amur Tiger video.

It’s a nice display and I enjoy drawing with it, so that’s why I chose it again for this video.

For recording and editing, I use Camtasia Studio 8. It’s a simple interface that gives me what I need without complicating things. I’ve been using this software for many years and it gets the job done.

While this video added an extra few unpaid work hours to my Sunday morning, I created it to give my newspaper clients some added bonus content for their websites and social media feeds. In any business, you’ll rarely go wrong by offering added value from time to time.

As always, feel free to share it, along with any of my other work.

Cheers,
Patrick

@LaMontagneArt
If you’d like to receive my newsletter which features blog posts, new paintings and editorial cartoons, follow this link to the sign up form.

Posted on

Wacom and Happy Accidents

My friend Pam, who is the Database Marketing Manager at Wacom, posted a very nice blog post on the Wacom Community Page, featuring the video they had me do for them. She also  shared the story of my tiger painting that went awry.

Funny, but Pam and I talked after the fact and both of us agreed that the strange twist with that painting actually made for a better story to tell in the video. Something I’ve learned over the years is that the stories behind the art are as interesting to folks as the art itself. That’s nice because not only are the stories about why I paint some of these critters important to me, but I enjoy telling them.

There’s a common term among creative types, that describes how sometimes your art or experience delivers a better result than what you had initially planned, from being forced to adapt to the unexpected. We call them happy accidents. I’ve had them happen while creating brushes, trying new painting techniques, program crashes that required creating handy shortcuts to deliver on deadline, and just like hindsight, you never quite realize what happened until you’ve had time to reflect. Some of those happy accidents became part of my process.

I’ve heard from a number of people this week who not only appreciated learning about the controversy surrounding white tigers, but also preferred the second painting over the first. Who knew?

Here’s the blog post on the Wacom Community Site.

Cheers,
Patrick

If you’d like to receive my newsletter which features blog posts, new paintings and editorial cartoons, follow this link to the sign up form.

Posted on

Dabbling in Something New

Before I became self-employed full-time, I was the admin assistant for a physical therapy office here in Canmore. For a lot of the time, it was just my boss Shane (the physiotherapist) and occasionally a massage therapist working there in the small clinic. If I recall, Shane and I are close to the same age, both into technology, and he was well aware of my eventual plans to work for myself, as my business was thriving part-time on the side. I only worked for him for a little over two years, I think, and I often tell people that it was the best last job to have. That was more than ten years ago. I left on good terms and when I run into Shane on the street once in a while, I’m always happy to see him.

Because we talked about our mutual interests a fair bit when it was slow, he knew that I had been looking into 3D modeling. I had no designs on getting into it hard-core, but just enough so that I could occasionally add some 3D to my editorial cartoon work. At the time, I wasn’t painting more than the occasional caricature for a client and definitely no animals. I was still exploring my options, however, dabbling in Flash animation, trying new things to see where my career might take me.
boardgameMy first year working for Shane, he ended up buying me one of the earlier versions of Carrara by Daz3D as a Christmas bonus. He and I had talked about the software earlier and I remember thinking that was quite thoughtful. Instead of just a cash bonus, he bought me something I wanted but really couldn’t prioritize as a valid expense as I was still very much a struggling artist and it wasn’t cheap.

Shane now has a much larger clinic in another location, with a number of physiotherapists, massage therapists and staff working for him and I’m glad his business is such a success. Both Shonna and I have gone there for physiotherapy since.

I loved working with Carrara and bought a supplement for it called Hexagon, which was a basic modeller. Stuff I created in those programs ended up being part of a number of editorial cartoons. Rather than search for reference or work out difficult perspective on some things, I just built basic models of what I was envisioning, brought them into Photoshop, traced over the bones and moved on from there.

Sometimes, I just built the whole cartoon in 3D, like the chess pieces below. It was a real time saver. It also allowed me to move models around to get better angles, more interesting perspectives and revealed possibilities I might not have considered. Four of those cartoons you can see in this post, all built in 3D, with some drawing in Photoshop after the fact. A few of these were way more complicated than they needed to be, but I was also experimenting.
checkmateThis Checkmate cartoon was for the Alberta PC Leadership race. Not knowing the outcome, I was able to create three different versions, with the names changed to reflect all three possible winners. When the result was in, I just sent out the correct one you see here.

Over time, I stopped using 3D because I wasn’t interested in doing more than I was doing with it, every new release of the software involved learning new things I didn’t need, and a simple process I enjoyed became a complicated mess as they often fixed software that wasn’t broken. Eventually, the software wasn’t being supported anymore and I just let it go. I had also moved on to doing a lot of painting and the animal work that is now such a big part of my life.

Every so often, however, I’ll start drawing an editorial cartoon and think, “this would be so much easier if I just built a 3D model first.”

That’s been popping up in my head more often the last couple of years. I’ve also thought that it might be fun to build some 3D caricatures of both people and animals. To be honest, it’s been some time since I’ve yearned to learn something new, even though this would actually be revisiting an old interest with new tools and a new perspective.

I’ve investigated other 3D software here and there and it’s often too expensive to justify and too complicated for my needs. It would be like learning to fly a Boeing 747 when all I need is to drive to the grocery store. I have limited time to learn new things and keep up with everything else I do. I also knew that I would lose interest in it fast if I had to essentially follow stereo instructions just to create a flower pot.
blocksOne of the best programs out there, however, is one called ZBrush. A lot of professionals use it in conjunction with other software and some of the results I’ve seen are incredibly impressive. But for the cost and learning curve, it looked like the same story. Too big.

In recent months, however, I’ve been hearing a lot about the recently released ZBrushCore, which is a trimmed down version of ZBrush. I’ve watched a number of videos and it reminds me a great deal of Hexagon and Carrara, those early pieces of software I enjoyed so much. The difference is that it’s more sophisticated, streamlined and offers more functionality without being a complicated mess. Few artists are programmers and when it goes so far toward the tech that it no longer feels like creating, then I’m lost.

After watching a number of tutorials the past couple of days, I bought ZBrushCore this morning for $200 Canadian, which I consider very affordable.

I’m a little excited about this, and while the challenge will still be to make the time to learn it, use it, and have fun with it, I’m optimistic. Learning something new this winter might also be a partial antidote to my usual seasonal doldrums. So, it’s likely I’ll be adding some 3D elements to my editorial cartoons in the coming year, and might even try out a funny looking animal or two. If nothing else, I hope to have a little fun sculpting.

My animal Totems started as an experiment, painting a funny looking grizzly bear. Who knows where this might lead?
electionbox

Posted on

Lizard Sketch in Painter 12

LizardSketchFBIn my ongoing efforts to incorporate Painter 12 into my workflow, this is another painted sketch.  As is my style, I’ve taken a lot of creative liberties with the anatomy of our lizard friend, here.

For this one, I used only the Chalk Brushes in Painter.  While I fully expect to incorporate a mixture of the available mediums in the future, restricting myself to only one at a time right now is forcing me to get used to and judge each on its own merits.  I really enjoyed working with chalk, especially since there are a number of different types to choose from.  One of the great features I found with Painter 12 is the availability of adding paper textures while painting.  In real life, the texture of the paper would be universal over the entire image, but not so in the digital realm, at least not in Painter.  I can change paper textures so it only affects the brush strokes I’m making at the time, and then change again without affecting the ones I’ve already made.  Adds a texture element when I need it but doesn’t restrict me when I don’t.  Great feature!

Something else I’m enjoying a great deal in is the Brush Tracking feature.  I’m painting on the Wacom Cintiq 24HD and even though my pen pressure is pretty consistent and I’ve got the Tip Feel set to how I like it in the Tablet Properties, different mediums in Painter require a lighter or softer touch.  Brush tracking on the fly allows me to change the pressure sensitivity as often as I’d like.  It’s really easy to do and takes very little time away from the canvas.

I’m really enjoying discovering all that Painter has to offer this Photoshop artist and I plan to keep at it.  I have a feeling I’ve just scratched the surface.

Posted on

Taming Painter 12

TigerSketch

In an effort to broaden my digital painting horizons, I recently bought Corel Painter 12 and am trying to get used to it.

Having been a digital painter with Photoshop for many years now, I’m very comfortable not only with the default tools, but with customizing and designing my own brushes so that I can paint the way I like.

By pairing and customizing Wacom’s hardware and Adobe’s Photoshop software, I’ve developed a very comfortable workflow and I know how to get the results I want with the tools at hand.  So if everything is working so well, you might wonder why I’m bothering with Painter.  The short version is that Photoshop and Painter are the industry standards when it comes to digital painting.  Some artists use only one of them, but many use both together, taking advantage of the strengths that each offers to produce the best results.  I would like to have that option.

I invested in some initial training with Lynda.com to try to learn the ropes, but it didn’t give me what I needed.    The class and instructor were fine, but when it comes to software, I seem to learn best by first doing something.  If I can’t figure it out by trial and error (usually a LOT of error), then I’ll go searching for articles, videos, and classes online.

The painted sketch you see above is my first attempt at painting in Corel Painter 12.  It took me a few hours as I tried a lot of the different available mediums, quickly realizing which ones I didn’t like and which ones had potential.

Painter 12 is designed to emulate traditional media.  If you’re a traditional artist, that’s probably great news.  But I’ve never painted with traditional tools.  I learned how to paint in Photoshop, so to use oil painting or watercolour in Painter was incredibly frustrating because I’ve never used them before and didn’t like the way they worked.  In all honestly, there were a few instances where I tried a brush and said, “Ugh!”, disgusted at the results.  When it came to the cloning tools, I abandoned them without even taking them for a spin.  I’ve never like painting or tracing over a photo and those tools are designed to do just that.  While some people enjoy working with that option, I’ve never done it in Photoshop and I don’t plan to start now.  Photos don’t belong in my work.

Now you might be wondering if this is just a blog entry to slam Painter.  Let me assure you that it’s not.  While half of my drawing and painting time was spent with a furrowed brow and clenched jaw when the tools were not working the way I wanted them to, the other half was spent with raised eyebrows in surprise and even a grin or two when I discovered a few things I really liked.  I might have even said, “hey, that’s cool” out loud a few times.

Once I realized that I didn’t have to use EVERY medium in Painter, I started to enjoy myself.  After all, I only use a small percentage of the features in Photoshop.  Painter is designed to emulate most traditional mediums so that it appeals to a wide range of artists.  But it doesn’t mean that a watercolour painter now has to learn oils and charcoal just because they’re suddenly available in the same place.

I found painting with the acrylic brushes really enjoyable.   They work the way I want them to and I plan to spend a lot of time painting with those.  The airbrush tool offers a LOT more options than the Photoshop airbrush does, so I’m really looking forward to incorporating that into some fine detail work.

I pride myself on having a really good handle on the Photoshop brush engine but the Painter brush engine is a whole new animal.  I’m bracing myself for when I tackle that monster.  Taming that beast is an absolute necessity because designing and using my own brushes is a big part of how I paint.

So what do I think of Painter 12 after only using it a short time?  I think it’s an impressive piece of software that I have no idea how to use.  Now, had you asked me the same thing about Photoshop ten years ago, I would have given you the same answer.  They do share many of the same shortcut keys and tool options, like zooming, panning, layers and other functions, but there are other operations that are completely different and therein lies the challenge.

When talking about this on my Facebook page, I said, “It’s as if somebody came into the kitchen while I was cooking and moved everything to different cupboards and drawers, changed labels, and translated the recipes into foreign languages.  I can still cook, but there won’t be any finesse to it until I get used to the new layout.”

Just like anything worth doing, it’s going to take me time to become good with Painter, just as it took years to become good with Photoshop.   When it comes to painting, neither one of them is a ‘press this button, press that button’ piece of software.  Digital painting is an art medium all on its own.  If I were learning how to paint with oils, acrylics, watercolour, charcoal or any other traditional medium, the learning curve would be just as steep, if not more so.

I’m off to a good start, but I’m under no illusion that I’ll be doing any commission or gallery work in Painter anytime soon.  Probably a lot more of the type of painted sketch you see above for the next little while.  But I plan to keep at it, work through the frustration and practice as often as I can.

When it comes down to it, that’s the only way to create better art no matter what medium you’re using.

Posted on 1 Comment

My Wacom Cintiq 24HD Settings

For this second blog entry on the Wacom Cintiq 24HD (read the first one here), I wanted to show all of the different settings I’ve chosen for the Express Keys, Touch Ring and Radial Menu.  I’m very comfortable using these hardware features on the Intuos tablets, but had to change everything up for the Cintiq for two reasons.  The first is that there are more settings to choose from.  The second is that working directly on the screen changed how I do things.

These Photoshop settings are in no way being shared in order to tell you what you should do.  Feel free to borrow anything you see here, of course, but I would encourage you to experiment with the settings and find ones that work best for you.  There are so many possible configurations that you can almost program each of the Express Keys, Touch Rings, and Radial Menu for anything you want Photoshop to do.  The feature I like best is that you can even program different settings for every piece of software you have.

My buddy Jeff Foster is an Author, Producer and VFX Artist at Sound Visions Media.  My setting for brush size on the pen, which I’ll explain later, was his suggestion and it works very well.  Since I’m no longer using the Touch Ring for brush size, he also suggested that the Touch Ring can be used for any keystroke operation at all, so it’s important to think differently and creatively.  I still haven’t finished experimenting with my Touch Ring settings, so some of the ones I show here will likely change.

Because there are so many settings to explain, I’ll just get right to it.  Here are some photos that show you what the buttons I’ll be talking about look like on the actual hardware.  I got these images directly from the Wacom site, so if you want to know even more about the Cintiq 24HD than what I’ve shown here, just click on any of the images and you’ll be instantly transported to their website.  It’s like magic, don’t you know?

As you can see from the image at the beginning of this post and the ones above and below, there are five Express Keys and a Touch Ring, with three settings each, on either side of the display.  Additionally, there are three buttons above the display for features I’ll explain later.  On the top edge of the display, which you can’t see here, there are a series of buttons like you would find on any monitor, to adjust your display color, brightness and contrast settings.  Incidentally, I like to work with my monitor brightness a lot lower than most people.  I have my Contrast set to 50, my Brightness to 13, and my Backlight to 0 (Zero).  You might think that a little odd, but it works very well for me.  My monitors have always been set to low brightness and my eyes don’t get strained as easily from long hours in front of a display.

Let’s talk about those three little buttons at the top right above the display.  From left to right, there is one that has a lower case letter i, one that looks like a keyboard, and one that looks like a wrench.  The i is for information, and when you press that, you get the image that you see below.  It fills the display, regardless of the software you’re using, BUT the settings you see displayed will be the ones you have set for that particular piece of software, or the default settings.  What you see here are my settings for Photoshop.  This is a great feature because you might forget what you have a button set for and this will show you in real time.  We’ll zoom in on all of these in a minute.

The second button will bring up the on-screen keyboard, which is pretty self-explanatory.  Sometimes you just want to type in a layer name, or press a number, and you don’t want to have to go fishing for your actual keyboard, especially since it might be under your Cintiq.

Finally, there is the button with the wrench on it, which will bring up your Wacom Tablet Properties.  I just think this is very clever to include this as a hardware button because sometimes you just want to make a quick change to your settings, and you don’t want to leave your software or go searching for it in your menus.  Press the button, it will bring up the panel you see here, make your change, close it and go right back to work.

Now let’s take a closer look at how I have my Express Keys, Touch Rings and Radial Menu set up.  I won’t show you how to make these changes, because that will require a whole new post.  If you want some help, I recorded a couple of videos for the Intuos5 and those will show you how to change your settings, even on the Cintiq.  Here are a couple of links, one for the Express Keys and Touch Ring and another for the Radial Menu.

Let’s take a look at the Express Keys and Touch Ring Properties.  As you can see below, the three buttons for the Touch Ring are currently set to Zoom, Brush Size, and None.  Rather than use the default Zoom, however, I have mine set to Ctrl- and Ctrl+ (Cmd- and + on the Mac) shortcut for Zoom.  The reason is that will zoom in and out in increments that keeps my painting sharp and crisp.  Some of the other increments in between can make images a little blurred and I don’t like that.  So my zoom isn’t a smooth transition, it goes in steps.

Brush Size is self-explanatory, although I now have that on my pen, so I’ll be finding another use for this spot, I think.  The third one is normally set for Rotate, as in rotating the canvas, but I have it set to None simply because I was recently recording a video and didn’t want to accidentally zoom in while recording if my finger touched the ring, so I set this to none and left it there while I recorded.  Again, I’ll be finding another use for this one, too.

For the Express Keys on the left of the display, I have them set as follows:

1) Undo – Ctrl-Alt-Z. (Cmd-Option-Z on the Mac).  When I’m painting, I pretty much keep a finger on this most of the time and it allows multiple undos.

2) Color Picker – This is not a normal keyboard shortcut, so I had to create one, which is fairly easy to do in Photoshop.

3) Shift – a Modifier Key that will give many tools more options.

4) Ctrl – (Cmd) another modifier key.

5) Pan/Scroll – In Photoshop, this is the Hand Tool and it will allow you to move around the canvas.

On the right side of the display, the Touch Ring again is still set for the default settings.  I know I’ll find a use for it, I just have to get creative and even more efficient.

For the Express Keys, they’re set as follows:

1) Gamut Check – Ctrl-Y (Cmd Y).  I draw and paint in sRGB, but I’m always aware that my editorial cartoons are printed in CMYK and some of my paintings and illustrations may be printed that way as well.  My color picker is set so I can only choose colors that are ‘in gamut’, which means when converted to CMYK, they won’t shift.  But sometimes when I make a Levels or other Color adjustment, it will shift colors too far, so I’m always checking Gamut to make sure everything looks as it should.  Newspapers do not have universal color settings.  Some publications have downright hideous printing, so I try to find a happy medium to please everybody.  Yeah, I know…good luck with that.

2) Hide – Ctrl-H (Cmd-H) When I’m working with selections, this hides the little ‘marching ants’ that define a selection, because I hate looking at the moving dotted lines when I’m painting.

3) Radial Menu – This is Wacom’s way of giving you even more choices.  It’s an onscreen heads-up display that gives you an opportunity to program your own menus and submenus.  I’ll show you my Radial Menu settings in a minute.

4) Fit Screen – Ctrl-0 (Cmd-0) Zooming in and out of a painting or drawing, often I just want the image to reset to fit screen.

5) Display Toggle – I have multiple displays, my other one is above the Cintiq.  When I want to access the other display, I press this button and my pen can move the cursor to my other screen, which makes the top half of the Cintiq display work just like a traditional Wacom tablet.  It’s a great feature.

My Pen Settings are as follows:

Erase – This button is a waste for me and I can’t even think of a reason to use it for something else, either.  I’m sure other people do use it, but I never have.

The button on the pen is actually two buttons.  Originally, it’s set for a Left Mouse and Right Mouse configuration, but as mentioned previously, my friend Jeff gave me a reason to consider other options.  For the left Mouse Button, the one furthest from the tip, I have it set to the keystroke configuration you see in the image.  What this allows me to do, when I have the Brush selected in Photoshop, is change brush size very fluidly.  I press the button, move the pen left or right and I can see the brush size change on the screen.  This was one of those, “I wish I’d known this sooner!” moments, because I would have had my Intuos tablet set to this as well.

The Right Mouse button, the one closest to the tip, is set to Alt (Option on the Mac).  When I have the brush selected in Photoshop, this toggles the Eyedropper Tool for easy selection of color in a painting.  I use this constantly for better blending and color transitions in my work.  So now I can change brush size and select color quickly and easily right from the pen.  It’s a very enjoyable way to paint.

And finally, here are my Radial Menu settings.

When you press the Radial Menu button, you get the circle on the right, which is fully customizable.  If you wanted to, you could make every one of those pie pieces into a submenu.  I currently only have three.  When you click on each of those submenus, you get  the images on the left.  Each submenu can not only have a full selection of pie pieces, but those can be submenus as well.  I’m no math wizard, but that gives you a LOT of choices for custom configuration.

Obviously I don’t need to explain every one of them, but I’ll give you some thoughts on what some of the more unique ones do.

Blend Modes Submenu – I use four Photoshop Actions for Blend Modes all the time in my drawing and painting.  OK, that one that reads ‘Cartoon Websize’ is an Action for something else, but I had nowhere else to put it and I use it every day.  But the rest are for Blend Modes, I assure you.  If you don’t know about Blend Modes in Photoshop, my buddy Scott Valentine just wrote a great new book that explains them very well.  I’ll have a review of the book very soon, but if you want to check it out, here’s the link.  The Hidden Power of Blend Modes in Adobe Photoshop.

Flip Canvas – Often when I’m painting, I want to shift my perspective, so I’ll flip the image I’m working on horizontally.  You’d be surprised how helpful this can be, especially when it comes to likeness in portraits.  Sometimes I’ll just know that something doesn’t look right but I can’t put my finger on it.  By flipping the canvas, the problem will almost always become immediately apparent.  Your brain gets lazy and this will often give your perception a bit of a slap.

So there you have it.  These are my settings on the Cintiq 24HD…for now.  I fully expect to make little changes and tweaks as I get more used to the display, but these settings are working very well for me at present.  There really is no excuse for not being able to customize this display to work exactly the way you want it to.  Yes, it will take some time to get it perfect, but it’s worth it.  Wacom has not only provided hardware that will allow you to create the best drawing and painting experience possible, but the software takes it even further.

Don’t be afraid of making changes.  There is a default button in the Wacom Tablet Properties.  If you mess it up too much, you can always start again.  When you do get the settings you want, however, back them up!  I can’t stress this enough.  Computers aren’t perfect, software can conflict with other software, and stuff happens.  There is a Wacom Tablet Preferences Utility included with the software.  It will allow you to save and restore your preferences should the unthinkable happen.  Just as you should back up your images and files, you should also back up your preferences.

If you have any issues, Wacom’s technical support is very helpful.  And finally, if you just have any questions, I’m happy to help, too.  Thanks for stopping by and hopefully this helped you see some possibilities you might not have considered, whether you’re using Wacom’s Intuos tablets or their Cintiq displays.


Posted on 1 Comment

Fear and loathing of photo-painting

Anybody who knows me in professional circles knows that I’ve never been a fan of photo-painting.  While I don’t go out of my way to rant and rave about it, I’ve been pretty clear that I don’t like the practice of painting on top of a photo, that I’ve always felt it had a cheat quality to it, very much like paint by numbers.  I’ve had to bite my tongue and hold my anger in check whenever somebody has suggested that my paintings are just photos that I’ve painted over or manipulated.  It happens often enough that I have a chip on my shoulder about it.

I’ve always felt that if you’re going to learn how to use paint brushes in Photoshop, how to make them work for you, why not go all the way and just start with a blank canvas?  Use the photo for reference, but don’t go sampling the colours and painting on top of it.  I’ve pretty much dismissed it as something not worth my attention, resigning myself to loathing the practice, and making a concerted effort to ignore it.  People are going to do it, regardless of what I think, so why bother wasting my energy on it?

Now, I’ll admit to thinking twice (three, four times) about writing this piece, because it reveals flaws in my character.  While we all have them, of course, most of us don’t like to out ourselves when it comes to the things we keep hidden under the image we like to project.  But, there is rarely an opportunity to grow when you lie to yourself and as someone who follows the antics of politicians for a living, I can only stomach so much hypocrisy without pointing a finger at it, even when it comes to my own.

This week, I had occasion to throw open the door to my feelings on photo-painting for three reasons, all of which were revealed through posts on social media.

The first, was a link posted by a friend, an article by a vegetarian who had to deal with some of her ‘friends’ shunning her when she chose not to eat meat anymore, even though she wasn’t expecting them to do so as well.  I went looking for the article to include here, but I couldn’t find it.  Suffice it to say, it spoke a lot about our innate fear of change and how often the things we hate (strong word, there) are things we fear.

The second, was a piece written by Sam Spratt,  a guest on Scott Kelby’s blog this week.  While I enjoyed the whole blog entry about his thoughts on digital painting, the part that resonated most with me, was about artists who fear technology and how people skilled in one medium will often look down on those who work in a different medium.  I’ve talked about the latter myself in previous blog entries.

Third, and finally, Russell Brown, one of the pioneers of Photoshop and somebody who continues to look for new ways to push the technological and creative envelopes, revealed an add-on extension for Photoshop called the “Adobe Painting Assistant Panel” which is designed to help turn photos into paintings.  To be clear, I have nothing but the utmost respect for Russell.  In fact, I even painted his portrait recently.

I’ll admit that if somebody ever told me that I feared technology, I’d be taken aback.  My tools of the trade are all about technology.  Photoshop, Wacom tablets, my computer, laptop, painting on the iPad, I am a digital artist.   But after being exposed to those three sources this week, I began to ask myself, “Is it possible that I might be afraid of technology?”

The answer, it turns out, is No.  It’s not technology that I’m afraid of.  What I am afraid of, is obsolescence.

I know a lot of photographers who lament the fact that anybody can buy a DSLR camera these days, set it on automatic, take a photo and call themselves a photographer.  If you go looking for them, you’ll have no trouble finding MANY discussions online, often heated, that complain about people who are being hired to shoot weddings, portraits, and events, who are mediocre at the craft, essentially taking money away from ‘real’ photographers.

This is clearly a case of anger motivated by fear.  If the paying public can’t tell the difference between somebody with a point-and-shoot and a dedicated professional photographer, then how is anybody expected to continue making a living at it?

I’m not a photographer, so whenever I see this fear being played out in arguments and discussions, it’s pretty easy for me to see what’s going on.  It’s easy for me to pass judgment.

And yet, I didn’t see it in myself until just this week.

The reason I don’t like photo-painting is because I’m afraid that the paying public can’t see a difference between painting over a photo and the work that I have devoted years of my life to becoming skilled at.

That wasn’t easy to admit.  In fact, it’s downright humbling.

I’ve also realized that the same thing applies to how I feel about similar practices playing out in editorial cartooning.  I’ve seen competitors take a photo they found on the net, apply a few filters to it, slap on a caption and it gets published in a major daily newspaper.  This is happening quite often these days and I’ll admit to being pretty angry about it, upset that they were cheating.  The reality is that I’ve been afraid that if that’s all it takes to get published, then anybody can call themselves a cartoonist and they won’t need me, that the time I spend drawing is wasted, because some editors just don’t see the difference, or they don’t care.

My wife, Shonna, always a sobering voice in discussions where my emotions get the best of me, spelled it out quite well when I broached the subject with her this week, about my realized fear of photo-painting.

While I can’t recall her exact words, she basically suggested that it doesn’t matter how somebody creates their work.  If they take a photo, apply a few filters to it and call it a painting, it doesn’t really affect me at all.  They still have to sell it.

That was my moment of clarity in all of this and what will finally enable me to put it behind me.

Art isn’t about how it’s done.  Art is about how you feel when you experience it.  That applies to photography, sculpture, painting, music, performance, etc.  If you take a photo-painting that somebody has done and put it beside one of my paintings, the viewer most likely won’t care how it was created.  They’re just going to care if they like it or not.  If both pieces are for sale, they’re going to buy it based solely on that.  That’s how it has always been with art.

Some people really like my whimsical animal paintings and some don’t like them at all.  Some people buy them, some people don’t.  The fact that there are folks out there painting on top of a photo in Photoshop doesn’t change that in the slightest.

I’m still afraid of obsolescence.  I can freely admit it.  But I can use that, because fear is a great motivator.  It makes me try harder and scramble, eagerly seeking out opportunities to further my business and to ensure that I remain self-employed doing what I love to do.  While I have no intention of doing any photo-painting myself,  I’ve decided to no longer fear it.   As a consequence of that, I choose to no longer despise it, either.  It’s just another method for creative people to express themselves and that’s a good thing.  That’s art.