Posted on

iPad Painting with the Wacom Intuos Creative Stylus

RatiPadFBAs anyone who creates digital art for a living will tell you, it’s difficult to do without a Wacom tablet or display.  Beginning with the Graphire and the first generation Intuos tablets in the late nineties, I’ve used almost all versions and evolutions of Wacom products.   Currently, the one I use on a daily basis is the Cintiq 24HD display.  When I want to get out of the office, which usually just means moving to other parts of the house, I’m drawing and painting on the Cintiq 13HD.

Many people have asked me if I’ll be getting one of the new Cintiq Companion displays, but having just purchased a top of the line laptop to supplement my desktop PC, I don’t need another computer.  I make my living with my artwork and have daily editorial cartoon deadlines.  I can’t afford any downtime, so having another full system that I can work on if my main computer needs repair is very important to me.  As I work at home and spend 90 percent of my time here, a fully functional portable Cintiq Companion would be wasted on me, so the 13HD and a laptop suits me just fine.

From time to time, however, I do enjoy the portability of drawing and painting on my iPad.  I bought my first gen iPad about three months after it came out in 2010 and I used it almost every day.  I began with finger painting, and then I probably spent a couple of hundred dollars in the first year, trying to find a stylus that would work well for drawing and painting.  Eventually, I settled on the Wacom Bamboo Stylus and it worked very well for its intended use.  Having tried many different drawing apps, I found that the ProCreate app suited my drawing style best and it’s the one I use above all others to this day.

I like to rest my hand on the screen, so I cut the thumb, index, and middle fingers from a light glove and wear that while drawing and painting on the iPad.  I worked around the lack of pressure sensitivity by manually varying the opacity in the app.  A similar method is to add a new layer and vary the opacity of that as well.  A little awkward, but I managed to create some iPad drawings and paintings that I was pleased with, even if they took longer than they would have on my PC with a drawing tablet or display.

IntuosCreativeStylus
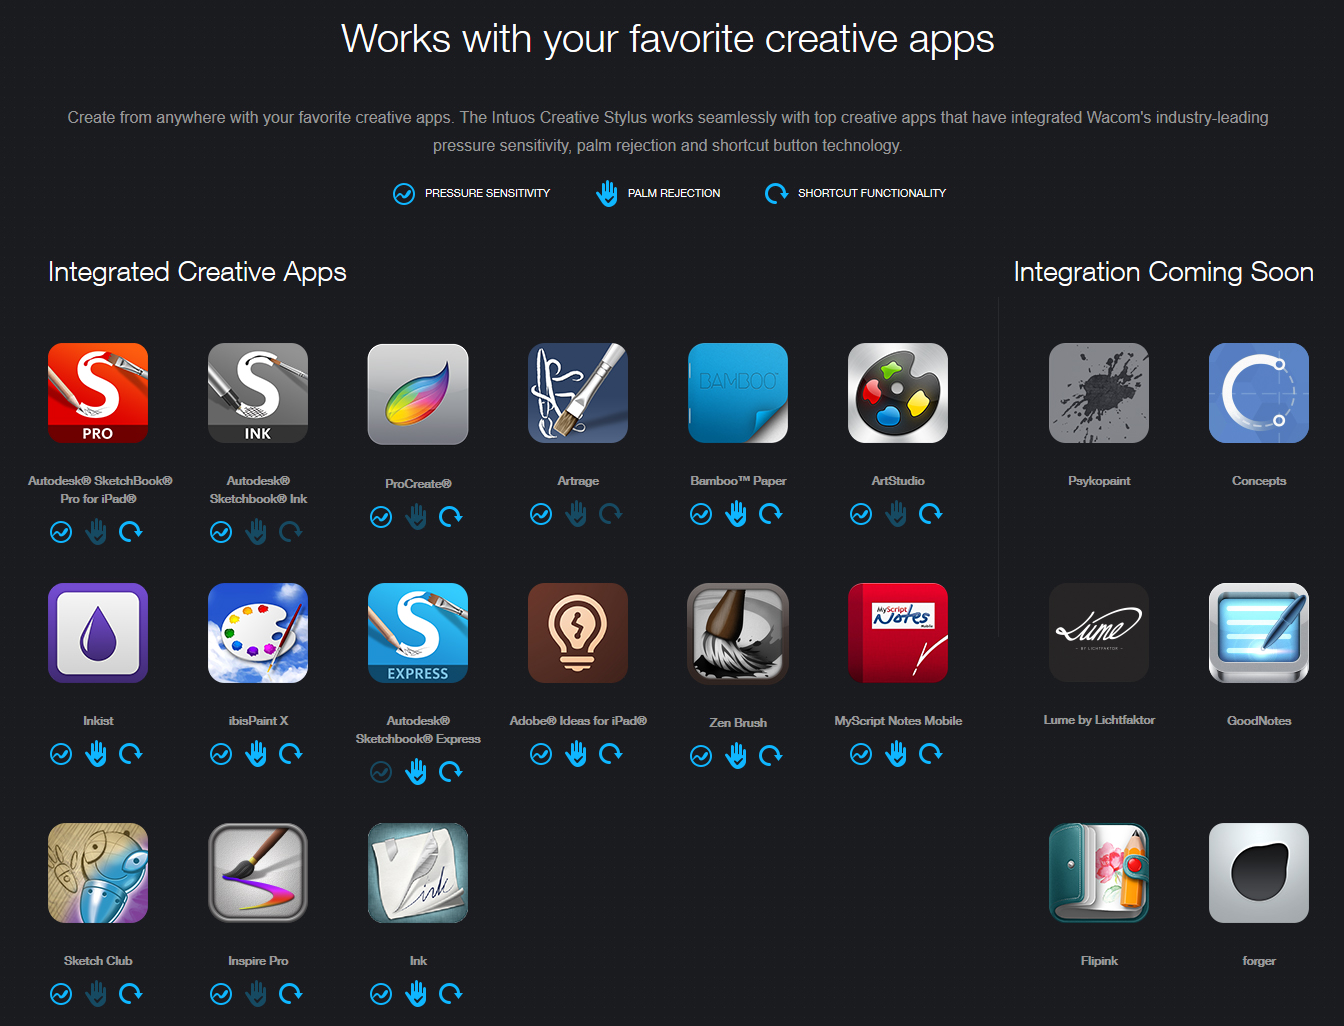
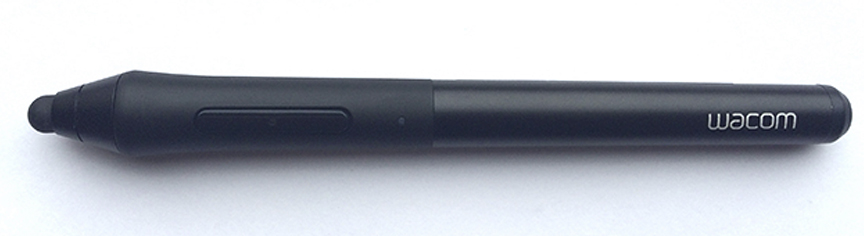
Recently, Wacom introduced their Intuos Creative Stylus for the iPad and I was intrigued.  It connects via Bluetooth, has pressure sensitivity, programmable buttons like their other tablet and display pens, and palm rejection capability, which means you can rest your hand on the screen without your palm creating any digital pen marks.  The key word here is ‘capability.’

As my first gen iPad had been proving unreliable and twitchy over the last year, I finally retired it and bought the new iPad Mini with Retina display, preferring the smaller size to the iPad Air.  The Wacom Intuos Creative Stylus arrived last week and I was eager to put it through its paces.

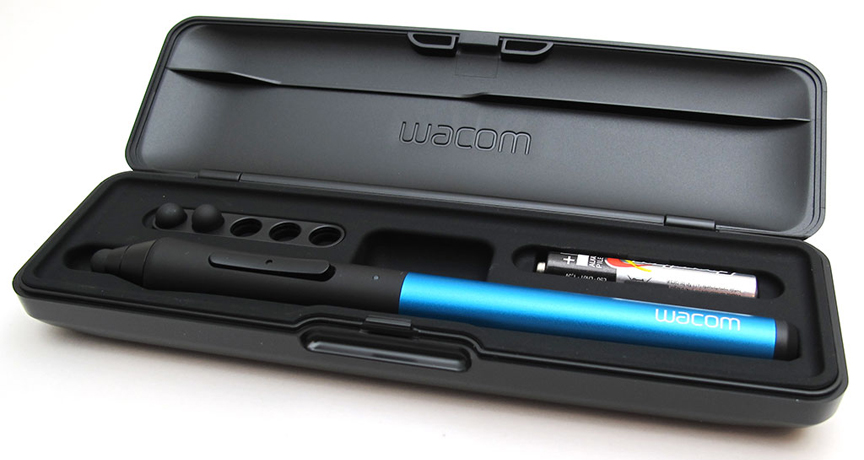
The first thing I was impressed with is that it comes in a very nice case.  With space for five spare nibs (it comes with two spares) and battery included, you feel you’ve purchased quality.  My Cintiq 13HD came with a very nice case for the stylus as well and it gives me peace of mind that these portable styli are well protected while they’re being carted around.

IntuosCreativeStylusCaseThrough trial and error and a little research, I found out some important technical info that will make your life a lot easier when using this pen.

First, the stylus takes an AAAA battery (that’s 4 As).  It comes with one of them, so it’s ready to use.  But I happened to be out running errands the day mine arrived so I wanted to see how hard it was to find replacements.  Fortunately I found a set of two at The Source, a small franchised electronics store.  A package of two batteries set me back $12.  Our grocery store battery display didn’t have AAAA batteries, so you might have to look to find them.  The Wacom site says a battery will last you 150 hours.  I spent a few hours painting with the stylus and the battery still reads 100% in the ProCreate app, so I’ve no reason to doubt the claim.

Second, I have a wireless keyboard that connects to my iPad via Bluetooth and you connect it in the iOS settings.  You can’t do that with the Intuos Creative Stylus, since it doesn’t even show up there.  The stylus connects to your iPad inside of the supported apps (click here and scroll down for the list).  In ProCreate for example, there’s a dropdown menu that shows a device option and sure enough, the Wacom Intuos Creative Stylus is one of the choices.  The connection was very stable and putting it away in the case seems to shut the pen off so it doesn’t waste the battery.

Apps
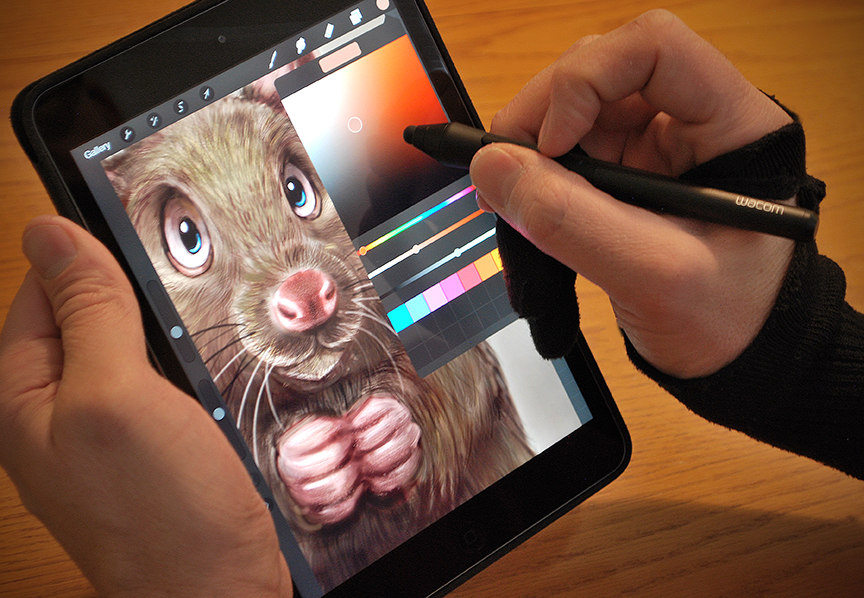
I didn’t bother to try any of the other drawing apps, so let’s just talk about ProCreate and this stylus.  I haven’t done any iPad painting in a while so I was very impressed with the recent updates ProCreate has made to their app.  They’ve got great blend mode options for layers, adjustments for color, sharpness, blur, multiple transformation tools and their brush engine allows for a LOT of customization.  ProCreate is a very robust app and I see no reason to change my preference.  It didn’t crash once while painting my funny looking rat, so it’s very stable.

I was disappointed that I couldn’t get the palm rejection to work well in ProCreate, so I ended up wearing the makeshift glove again which doesn’t really bug me.  It was only later that I found out that it isn’t the stylus that doesn’t support palm rejection, it’s the app.  Again, refer to the list of which features work with which apps.

The pressure sensitivity on this stylus works like a dream!  With the programmable buttons, ProCreate allows you to choose which task you want each button to perform.  I set one button to activate the color picker, and the other button to Undo.  You don’t even need to have the pen in contact with the tablet to get these to work, either.

AppandiPadBottom line, this stylus works as advertised.  While the price may seem steep to some ($99.95 from Wacom), I’m a big believer that you get what you pay for and my experience with Wacom devices is that they last and work well for a long time.  I’m being careful not to drop this stylus, though, as it’s still a precise electronic device.

A couple of final thoughts.  It would be unreasonable to expect this stylus to perform as well as a Cintiq display.  I can make quicker brush strokes, enjoy much more precise pressure sensitivity and paint with larger documents with higher resolution on my professional displays than I would expect to on the iPad.  This stylus does not turn your iPad into a Cintiq Companion display.  Also, keep in mind that Wacom created the stylus, not the apps with which it is used, so if there’s something that doesn’t work the way you might expect it to, it’s likely the app, not the pen.

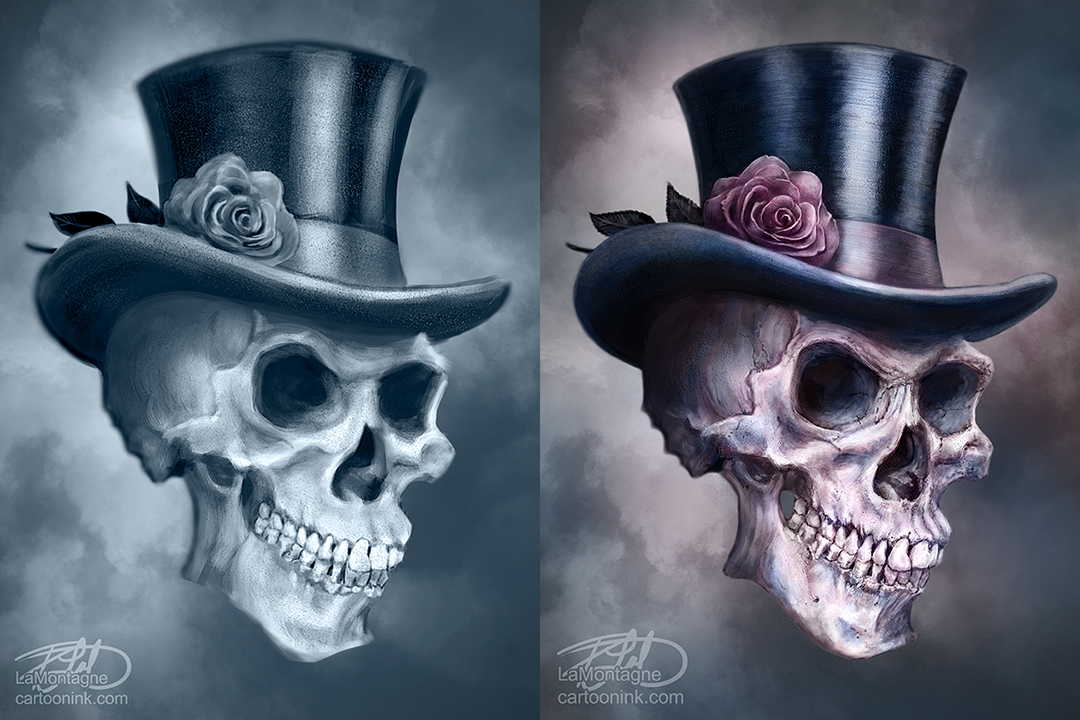
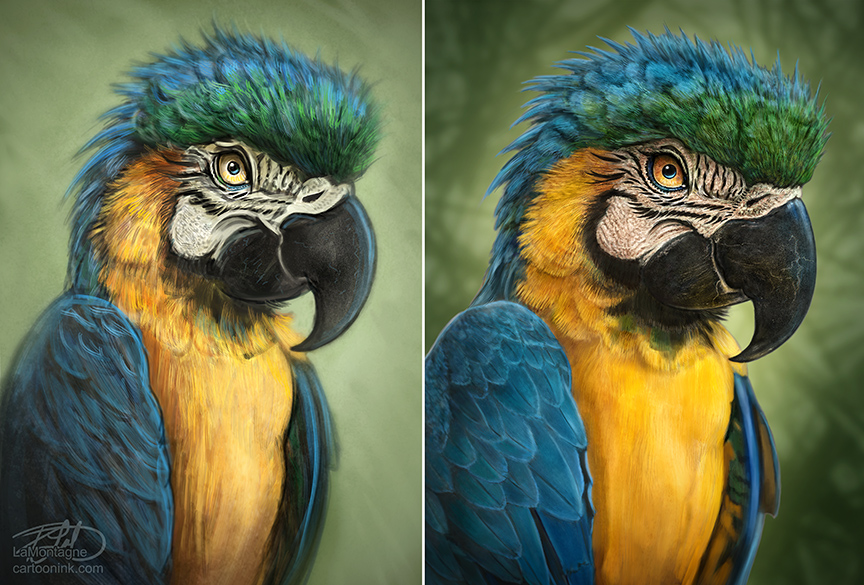
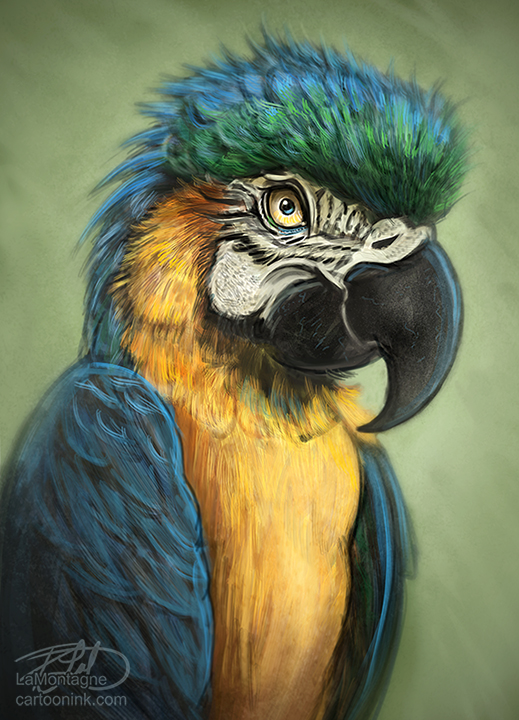
I’m very pleased with the Wacom Intuos Creative Stylus and I expect to use it often for sketching and rougher paintings.  Beginning the rat painting you see at the top on the iPad was quite enjoyable and the image will eventually become a much larger, much more detailed rendering using Photoshop and my Cintiq 24HD display.

I would recommend both the Wacom Intuos Creative Stylus and the ProCreate app without reservation, but as always, the tools are only as good as the artist using them.  For best results with your artwork, keep learning, follow the work of other artists, and draw and paint as often as you can.
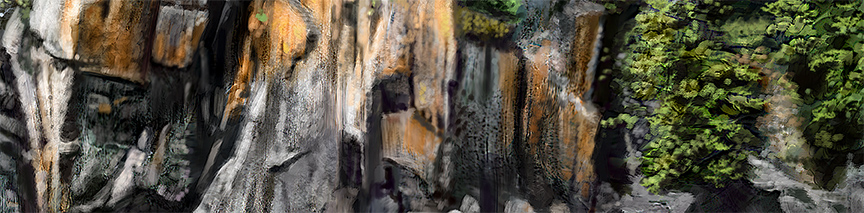
 

Posted on

Parrot Sketch

ParrotSketchFBWoke up earlier than I wanted to this morning on the first day of the year.  As I’m usually an ‘early to bed, early to rise’ type, the cat is used to me getting up at 5AM.  Creatures of habit and routine, she was pawing at my legs at 5:30, clearly not concerned that I had stayed up late last night.  As I’m not one who is able to get up for a half hour and then go back to bed, it was a good excuse to do something creative first thing.  With hot coffee and tunes in the headphones, I decided to do a sketch painting of this parrot.  With no intention of it becoming a finished painting, it was nice to just work on it without any expectations and you can never get enough practice.  I plan to do a lot more of these this year as I quite enjoyed it.

Happy New Year!

Posted on

Raccoon Totem

RaccoonTotemHere’s the last painting of the year and another addition to my Totem series.  At present, I’ve got about eight to ten animals waiting in the wings to be painted.  I’ve had the reference photos for a number of them for quite some time and even though I don’t have an order in mind, it just seems that each gets their turn whenever it feels right.  I had not expected to be painting the Raccoon Totem this year, but when choosing which would be my last painting of 2013, I went through the different folders and reference images, and it just seemed the right time to paint this one.

Whenever I try to manipulate which Totem I’ll paint, whether it’s for commercial reasons or a request from the gallery, I never feel completely good about it.  I learned a while ago to just paint whichever one feels right for the time I’m ready to start a new one and my best work will come through.  This time, it was the raccoon, and (say it with me)…I had a lot of fun with this one.

There appear to be new challenges with each Totem, whether it’s features or fur and for this one, the fur and hair was different.  It wasn’t particularly difficult, but the wiry raccoon hair is unlike any of the animals I’ve painted before.  Just as the Bison and Otter Totems required me to paint hair a little differently, the Raccoon required me to paint on more layers than I normally would, in order to get that deeper layered look I achieved with the hair in this painting.  I’m pretty pleased with how it turned out.

RaccoonCloseThis was painted on both the Wacom Cintiq 24HD and Wacom Cintiq 13HD displays, using Photoshop CC.  No photos or overlaid textures were used in this image, it was all done with brush work.  I don’t keep track of how long it takes to paint these anymore, because I usually spend an hour or two here and there over a two or three weeks when my other deadlines allow it.  As always, I relied on a few reference photos for this painting and would like to thank my friend Susan Koppel who provided me my main reference for this Totem.  Susan takes wonderful pet portraits, and also donates her time to her local Humane Society in Nevada and you can’t help but want to adopt all of the pets she photographs as she makes them look their absolute best.  Rather than me ramble on about her skill and talent as a photographer, check out her website and you’ll see for yourself.  You can find her at susankoppel.com

Happy to end the year with a Totem painting and looking forward to painting a lot more of them in 2014.


Posted on

Commission – Duke

DukeMy latest commission, this is Duke, painted in my Totem style.  While I often like to post work-in-progress shots online with paintings I’m working on, the first look at this one is the final image.  As it was a birthday gift for the client’s wife, and the client is also a friend, there was a slim chance that she might see it online and recognize it as her dog.  Let’s face it, ruining a surprise is just bad for business.  This was completed at the end of last month then sent off to my printer in Calgary.  The final print was a giclée on canvas, 18″X24″ with a shadowbox frame.  Shipped to Dallas, it arrived yesterday and thanks to the magic of online video, I was able to see the reaction when it was opened.  That’s just icing on the cake.

I know I say this a lot about paintings, but this was  a lot of fun.  I had a number of reference photos to work from and the client chose my exaggerated caricature Totem style of painting over my portrait style and I really enjoyed painting Duke with his happy goof expression.  It’s true that I enjoy both painting styles in which I work and I allow clients to choose which one they prefer for their image, but the Totem style is my favorite.  I laughed out loud a few times while painting this image and am glad I finally get to share it.

For those who like the tech details, I painted this digitally in Photoshop CC using both a Wacom Cintiq 13HD and a Wacom Cintiq 24HD display.

DukeClose


Posted on

Weighing Which Wacom

Sometimes having too many choices is just as bad as having too few, especially when it comes to technology.  What works for one person may not work for somebody else.

While I’m primarily a PC user, one piece of Apple tech that I really enjoy is my iPad, a first-gen device I bought in the summer of 2010 that I’m still using today.  With each new iOS, it gets a little twitchier and temperamental, but I have definitely got my money’s worth from it.

I’ve also been using Wacom devices for well over a decade now, from the early first generation Intuos and Graphire tablets to the Cintiq 24HD display that I use today, and I wouldn’t be able to do the work I do without one.

One of those fortunate souls who works at home every day, I have a dedicated office and spend the majority of my time at my desk, drawing and painting on my Cintiq 24HD, a display I’m very happy with.  Everything I need to be productive on a daily basis is in my office.  In the evenings, however, I like to sketch the next day’s cartoons or other images with pencil on paper while relaxing on the couch in front of the TV.  Sometimes I’ll do rough paintings and sketches on my iPad as well.

But lately, I’ve wanted to paint more detailed work or move on to the digital ink and paint stage of a cartoon without having to go upstairs to sequester myself in the office that I’ve already been in all day.

001

The newer Cintiq 13HD has abandoned the power brick of the previous 12wx, and while you still have to plug it in and connect it to a laptop, it has the resolution and screen space I want, and the ability to just prop it up on my knees to paint.  So I figured this would be my next portable device.

But then, Wacom recently announced the Cintiq Companion and Cintiq Companion Hybrid Devices.  The first is a stand-alone 13” Cintiq with all of the functionality and power of a laptop.  The Hybrid device works as a fully functional Cintiq 13HD when it’s plugged into a desktop or laptop, but becomes a portable Android device when it’s unplugged.

002Decisions, decisions.

First Option: Having just bought a very powerful laptop I eliminated the Windows 8 Companion quite quickly.  I like to write, which is one of the reasons I wanted the laptop, rather than a portable device with a peripheral keyboard.  The Cintiq Companion Hybrid, however, would allow me to work on the couch and also give me an untethered portable device to take with me on the go.

Second Option: Provided Apple doesn’t try to reinvent the wheel with the pending iPad 5, I could pair that with the standard Cintiq 13HD.  This would give me the portability I want for painting outside my office while still tethered to a laptop, plus allow me to keep using the iPad, which has many apps I rely on.  Wacom’s new Intuos Creative Stylus for the iPad (not first-gen) allows pressure sensitivity and palm rejection in some of the apps I already use for iPad painting, which means you can rest your hand on the screen and it won’t be confused with a pen stroke.  Currently, I have to wear a fingerless glove when I paint on the iPad to prevent that problem.

003Break it down, now.

Portability: The Companion and Companion Hybrid are being marketed that you can take them anywhere.  While I do enjoy working in a coffee shop once in a while and have to travel on rare occasions, most of my portable sketching is done with a pencil and sketchbook, especially since I’m usually out in the woods or in a creek canyon somewhere while I’m doing it.  The thought of taking a digital device with me to these wild places is unappealing.  Worrying about charged batteries, dirt and moisture on an expensive device, not to mention that I don’t want to be connected when I’m out in nature, is unappealing to me, which is why I even turn my phone off.  Whether it’s on a hike, camping, or out at a buddy’s cabin, I still prefer to draw in a traditional sketchbook.

When I do want a portable digital device, I already know that an iPad works very well for me and the Hybrid is too big to be a suitable replacement. With the new Creative Stylus, painting/sketching on the iPad when I’m in a coffee shop or other urban setting will do the trick nicely.

004If I lived in a city, had to commute, was constantly out and about and in need of all of the full tools I enjoy on my desktop, an argument could be made for the Cintiq Companion or Hybrid, and I’m sure it will appeal to folks who find themselves in that daily environment.  Living in the mountains, working at home, and wanting to be away from electronics when I’m out in the woods, however, I wouldn’t use this device to its full potential.

Cost: A lot of people are complaining about the cost of these new Wacom devices, but when you own the market, are leading the way in the technology and have put the R&D into creating the tech that every digital creative wants, to give it away is just bad business.  Supply and demand is as old as the hills.

That being said, budget is a factor.  Living in Canada, I have to buy from a reseller since only U.S. residents can buy from the Wacom site.  Despite the U.S. and Canadian dollars being at or near equal the last few years, Canadian prices are significantly higher than in the U.S., an angry reality that Canadians live with on clothing, books, technology, cars, and many other products.

The best price I can find on a Companion Hybrid in Canada is $1749.  That’s more than I just paid for my laptop.  The price on the Cintiq 13HD is $1089.00.

005All weighed and measured, I think I’m going to go with the Cintiq 13HD and a new iPad with the Intuos Creative Stylus.  The cost of all three of those, estimating for the iPad 5 of course, would work out to around $1900.00 and would give me the all-around best solution to fit all of my creative portable needs for a few years to come.

It’s important to understand that the reason I’m explaining all of this is not to tell you what you should buy.  It’s to illustrate the point that we all have individual needs and wants when it comes to technology.  Rather than buy every new phone, TV, tablet, computer or other piece of tech that comes out simply because it’s new, take a step back and ask yourself if what you want is really what you need.  Make a list of what you want to be able to do and buy the devices that fit you best.  Take the time to tailor your tech to your needs and you’ll be a lot happier in your work.

Posted on

Lizard Sketch in Painter 12

LizardSketchFBIn my ongoing efforts to incorporate Painter 12 into my workflow, this is another painted sketch.  As is my style, I’ve taken a lot of creative liberties with the anatomy of our lizard friend, here.

For this one, I used only the Chalk Brushes in Painter.  While I fully expect to incorporate a mixture of the available mediums in the future, restricting myself to only one at a time right now is forcing me to get used to and judge each on its own merits.  I really enjoyed working with chalk, especially since there are a number of different types to choose from.  One of the great features I found with Painter 12 is the availability of adding paper textures while painting.  In real life, the texture of the paper would be universal over the entire image, but not so in the digital realm, at least not in Painter.  I can change paper textures so it only affects the brush strokes I’m making at the time, and then change again without affecting the ones I’ve already made.  Adds a texture element when I need it but doesn’t restrict me when I don’t.  Great feature!

Something else I’m enjoying a great deal in is the Brush Tracking feature.  I’m painting on the Wacom Cintiq 24HD and even though my pen pressure is pretty consistent and I’ve got the Tip Feel set to how I like it in the Tablet Properties, different mediums in Painter require a lighter or softer touch.  Brush tracking on the fly allows me to change the pressure sensitivity as often as I’d like.  It’s really easy to do and takes very little time away from the canvas.

I’m really enjoying discovering all that Painter has to offer this Photoshop artist and I plan to keep at it.  I have a feeling I’ve just scratched the surface.

Posted on

Commissions: Lion-O and Gaia

Liono

For anybody that reads my random ramblings here on the site, it’s pretty clear that my favorite work is painting animals.  Whether they’re my signature Totem style of whimsical caricatured portraits, or the more traditional portrait look, I’m having my most fun when working with furry or feathered critters.  Once in awhile, I’ll even paint one that hasn’t got either (see Humpback Whale).

One of the great surprises of recent months is that more and more people want me to paint their pets, and in both styles.  While the portrait style is just as enjoyable, it’s a little more of a challenge.  When I painted my Wolf or Bald Eagle Totems, nobody was holding up a reference photo of one they know really well and deciding if I got the likeness right.  While a tabby cat very often looks just like a tabby cat, there are specific markings and features that have to be right or it just isn’t YOUR tabby cat.  Just as failing to capture the likeness of a person will collapse a portrait, the same can be said for missing the personality or likeness of a cat or dog.  Their owner (family member, companion, staff) will know the difference, even with the Totem style.

This past week, I finished these two paintings of Lion-O and Gaia, in order that you see them.  Each has different markings, fur textures, bone structure and personalities, so they presented their own challenges.  But both live in the same household, so the paintings needed to look like they belonged together on the wall.  The clients had choices to make.  Separate paintings or both cats together in one?  Totem style or traditional portrait style?  They chose the former of both options and I’m pretty happy with how they turned out, as are they.

GaiaFB

These clients were VERY patient.  We’ve been talking about this for quite awhile and they decided to go ahead with the paintings in January.  As you can figure out, it’s now May, so these paintings have taken awhile to get finished, but thankfully they weren’t in any rush, which gave me free reign to do my best work.  Much of that time was back and forth finding the right photos and they certainly did their part, giving me a great variety to choose from.  But even still, with the preparation for the Calgary Expo last month, my daily editorial cartoon deadlines and other commitments, I spent most days wishing I was working on these paintings but otherwise occupied with other parts of my business.

While I’m always taking commission work, lately I’ve been telling people that rush jobs just aren’t possible right now.  I would not be as happy with these paintings had I barreled through them and I would imagine the clients would not have been as well.  Currently I have a number of other clients waiting their turn for commissions and I’m booked up until at least the Fall.  I’ll be getting back to work this week on the Coyote Totem I started earlier this year and beginning my prep for the next commission of a dog portrait, this time in traditional style.  More animal cartoons, sketches, and rough paintings are planned in addition to putting the focus on more Totems.  It was a genuine shock to me recently when I realized that I have not painted a new one this year, despite the fact that I’ve got six of them waiting to be done, reference photos and all.

If you are interested in a commission and are willing to wait your turn, I promise I will make it worth the wait by doing the best job I can for you.   Here’s a link to the information and if you have any questions, feel free to send me a message via the Contact page.

Here’s a little bit of how it’s done, too.


Posted on

Mighty? Maybe not.

With the Adobe Max conference going on in L.A. this week, there are many in the design, photography and other digital creative industries that are actively talking about all things Adobe.  Most of the talk is surrounding the Creative Cloud and the subscription model.  In fact, I’ve seen and participated in some heated discussions the past 24 hours about the pros and cons.  Most of these arguments look very much like online political bickering, complete with name-calling, passive aggressive rants and the usual ‘my way or the highway’ arguments that are the staple of social media discussions.  Having expressed my opinion already, I don’t feel the need to repeat it all here.  Bottom line is that anybody who uses any of Adobe’s software will have to subscribe to the new model or eventually watch their tools become obsolete.  Time marches on, adapt and overcome, deal with it.  The corporate mind is made up and unlikely to change.  We’ll just have to agree to disagree and move on, since we should all probably be working anyway.

One of yesterday’s announcements that caught my eye was Adobe’s introduction of Project Mighty.  A pressure sensitive pen for the iPad and iPhone, connected to the cloud, allowing people to draw and take notes on the iPad. Before I talk about my impression, here’s a video that explains it, just so we’re all on the same page.

At first glance, this looks like it might be something very innovative.  In fact, I’ve had a number of people send me email and private messages since this was announced telling me I must be excited about this and asking what I think of it.  The only reason I assume they’re asking is that my medium for the majority of my work is digital and that I’ve also done a fair bit of iPad art over the past couple of years.  So having only seen the same video you just watched, my first impression is that the Mighty doesn’t strike me as memorable, at least not in this first edition.

I’ve tried a number of iPad pens over the last year.  Some of them have a plastic disc that rests on the screen, many have rubber eraser type nibs in varying sizes, and even one expensive disaster purported to be pressure sensitive, but ended up just being a waste of $80.00.  The battery didn’t last and it relied on raising and lowering the volume of the device since it communicated through the iPad’s microphone.  To quote Mr. Scott in Star Trek, “The more they over-think the plumbing, the easier it is to stop up the drain.”

Lemur

In my experience with art on the iPad, the strength lies in a well developed app, because the hardware is a compromise.  The iPad just wasn’t designed to use a pen and Apple has consistently showed no interest in answering the scores of artists who have been begging for one.  As Steve Jobs famously said, “It’s like we said on the iPad, if you see a stylus, they blew it.”

But with a good third party stylus and a well written app, you can still draw and paint well enough on the iPad.  The best apps that I’ve used to date are procreate, artstudio, and Sketchbook Pro.  I’ve been able to work around the pressure sensitivity quite well in all of these apps simply by varying the brush opacity while I paint.   Coupled with a good stylus, I find painting on the iPad to be quite enjoyable, despite having to wear a light glove so I can rest my hand on the screen while I draw.  The pen I settled on after trying many of them, is the Wacom Bamboo Stylus and it works quite well, despite the limitations of the iPad itself.  The paintings you see here were done on the first generation iPad with the Wacom stylus.

WhitmoreWhat surprised me most about Project Mighty is that it doesn’t appear to involve Wacom at all.  I’ve been using Wacom tablets and displays since the 90’s and while each new evolution is better than the last, the one consistent thing I could always count on was that there was no better name in pen and tablet tech than Wacom.  I would defy any digital creative artist to challenge that statement.  The industry standard for pen technology has long been Wacom and if this pen was a cooperative venture between the two, I would have expected Adobe to lead with it, so I can only assume that this was an independent creation.  It was my understanding that the two companies had a symbiotic relationship as most Adobe users I know are using Wacom tablets or displays in their work.  Wacom’s lack of involvement in Project Mighty (unless it’s some deep dark secret) is perplexing.

One of the biggest complaints I hear when reviewing any stylus or app for the iPad is that people want it to work like their Wacom tablet.  Same features, sensitivity, and functionality.  Unrealistically, many artists want the power of a robust computer mixed with a Cintiq 24HD that is light and allows them to take it anywhere.   Someday, I’m sure, but I still think that perfect device is a long way off.  Then again, we might see a hint of that soon.

On February 28th, this status update on Wacom’s Facebook page created quite a ripple through the digital creative world.  “We’ve heard you shouting out loud for a Wacom mobile tablet for creative uses. Well… we’re listening. We’ve read your email and spoken to many about an on-the-go dream device. It will come. This summer. We’re working 24/7 on it. And yes, it has a real pressure-sensitive professional pen, smooth multi-touch, an HD display, and other valuable features that you haven’t seen in other tablets.”

With this tease still resonating, I won’t be buying into Project Mighty.  When it comes to digital pen technology, I’m willing to be patient and wait for whatever Wacom has up their sleeve.  We might finally see tablet hardware that doesn’t ask artists to compromise.  If Wacom’s previous track record for stealing the show is any indication, I expect many artists will consider everything that has come before it to be just an opening act.


Posted on 2 Comments

Looking back on 2012

One of the great things about regularly keeping a blog is that it’s like keeping a journal.  I find that each year, I’m actually surprised at how much went on while I was drawing, colouring, and trying to keep from losing my mind.

Here’s a quick recap of the ups, downs, and other stuff that happened in 2012.

This Business of Art.

At the beginning of the year, I canceled my booth at the Calgary Comic and Entertainment Expo because I realized I wasn’t prepared for the April event.  In retrospect, and after attending as one of the hoard, it was a good call because I would have done a number of things wrong.  It wasn’t the best of times for that particular event this year as they did a number of things wrong as well, a casualty of their own growing popularity.  But I’m booked and ready for 2013 and I’m really looking forward to it.

It’s no secret that I enjoy working with Wacom.  I had the pleasure of demoing at their booth at Photoshop World in Vegas in September, was a guest on another of their webinars in November, and recorded a few videos for them throughout the year.  They’re also sending me to the Consumer Electronics Show in Las Vegas the second week of January, so it’s clear that Wacom has become a significant part of my life this year.

I’m fortunate to have been invited to be one of the artists represented on Insivity.com, a new site designed to inspire and motivate artists.  Still in its infancy and only officially launched this week, I look forward to writing and recording some exclusive material for it.  I’ll also be looking to be inspired myself, as we can all use a regular dose of that to keep moving forward.

Hardware and Software

Another Wacom highlight this year was the introduction of the Intuos5 tablets and the new Cintiq displays.  Every time I think they can’t make these products better, I’m happy to be proven wrong.   Both the Intuos5 medium and the Cintiq 24HD display are now tools I use every day and I can’t wait to see what they come up with next.

After 6 years using a great computer, it was time to bite the bullet and have a new one built this year.  While the last one worked great, it was Windows XP, only had 250GB of hard drive space, and was starting to have trouble running the big files.  I more than got my money’s worth from it, so no regrets.  Without boring you with the details, the new computer is top of the line and a real pleasure to use.

Photoshop CS6 was launched this year and while there were no particular ‘must-haves’ in the features for me, when you record training materials, you need to be using the latest software.

What with a complete upgrade of all of my software and hardware, anything I can’t accomplish in 2013 will be a failing in my skills, not my equipment.

Speaking and Training

I’ve been speaking to schools on digital art and editorial cartooning for a number of years, but with my ever increasing workload, I’ve had to be selective about how many of these I agree to.  Locally, I consider it part of my obligation to contribute to the community I’ve lived in for almost 20 years.  Outside of the Bow Valley, however, there is a fee for my time and travel expenses.

I enjoyed spending an afternoon with a group of art teachers in Red Deer a couple of months ago, introducing them to the entry level Wacom tablets and hopefully inspiring them to spend more time with the technology.  I found out that more of their students are requesting training in digital art.  A fledgling medium has now become main stream and I thought it great that traditionally trained art teachers were so willing to embrace it for the benefit of themselves and their students.

I had hoped to have recorded my next DVD for PhotoshopCAFE by now, Painting Portraits in Photoshop, but I had to keep putting it off in favour of more pressing obligations.  One of the obstacles was the technology.  I needed Photoshop CS6 and a new machine to run it. Now that I no longer have that excuse, recording the DVD has been bumped up the priority list and I look forward to having it done in the first quarter of 2013.

Prints and Products

In a sad turn of events this year, Two Wolves Trading Co. closed the doors in September.  It was the exclusive venue for my limited edition Totem prints and matted paper prints in Canmore.  The owners, Andrea and Michelle, did a lot for promoting my work.  Between their fun personalities and kindness, including that of their staff, it was a pleasure to have had my work sold in their store.

While the closing of the store did have an impact on my business, it was more disappointing to see friends close up shop.  A walk downtown always involved stopping in to Two Wolves to say Hi and kid around.  I still miss that.  Even though my work is available at About Canada in Banff, I’ll be looking for a new venue in Canmore in the new year, but it won’t be the same.

My prints were added to the inventory at the Calgary Zoo retail store this year.  Just a few paintings to start, but I plan to add fuel to that fire in the coming year.

In the meantime, I continue to sell the prints online through my own store.  I recently sent an email to my web designer, Erik Bernskiold, thanking him again for the great job he did on my site.  Everything works flawlessly.  A sale I had earlier this month was a lot of fun and worked very well.  It’s something I plan to do again sometime in the future.

One of the highlights of this year for my work was licensing five of my Totem paintings to The Mountain Corporation out of Keene, New Hampshire.  Their T-shirts are everywhere around the world, from retail outlets and zoos, to big box and online stores.  I was very pleased to have my work added to their catalog and I’m optimistic that these five will just be the beginning.  Having received my samples just this past week, I was very impressed with the quality of both the shirts themselves and the printing.

A lot of other little moments and events throughout the year, but through it all, there were well over 300 editorial cartoons, more than a dozen illustration gigs, and 15 paintings.   While going through my work this year, it’s amazing how much of it I thought I’d done LAST year or even the year before.

With the exception of one commission piece I’m still waiting for permission to post, these are the paintings I completed in 2012.  Clicking on any of the names or images will take you to the original blog post.

The Pets

In order, here are the commissions I enjoyed painting this year.  We’ve got Gilly the Pomeranian, Chase, the German Shepherd with the titanium tooth, Mocha the horse, and a portrait of Brisby, Australian Shepherd/Red Heeler cross.

Gilly


Chase


Mocha


Brisby


The People

Again, in order of completion, the first is Jim, one of my closest friends, and a portrait I did as a gift for his 50th birthday.  Then there’s Russell Brown in his Abe Lincoln getup, Madeline Kahn as Elizabeth from the movie, Young Frankenstein, and Martin Sheen as Tom, from the movie The Way.  I’ll have an update on the last painting sometime early in the new year.

Jim, a personal gift - Portrait

Russell Brown - Portrait

Madeline Kahn - Portrait

Martin Sheen - Portrait

.

The Totems

In order of when they were completed, here are the Cougar, the Rockhopper Penguin, the Bison, the Otter, and Bald Eagle Totems.

Cougar Totem

Rockhopper Penguin Totem

Bison Totem

Otter Totem

Bald Eagle Totem

So, all in all, pretty pleased with my body of work this year.  Most of what you see above wasn’t planned out at this time last year, so it’ll be interesting to see what I end up painting in 2013.  Obviously more Pets, People and Totems (oh my!), but other than that, there are no resolutions for the next year.  I’ve just decided to wing it and see what happens.

To you regular readers, those who follow my work on social media and are an endless source of encouragement throughout the year, you have my sincere thanks.  The only way I know if my work is making people happy is because you tell me, and it is greatly appreciated.  If you are an artist yourself, I hope you have found a little inspiration here, and believe in yourself enough to find your own style of art, something that speaks to you and makes you want to create even more.

Best to you and yours in the coming year!

Posted on 1 Comment

Martin Sheen – The Details

Martin Sheen - PortraitYesterday, I wrote about why I painted this portrait of Martin Sheen’s character, Tom, from the movie ‘The Way.’  Click on this link, if you’d like to read it.  Today, I figured I’d write a little bit about the how, as there are always artists out there who want to know the technical details, and I’m happy to oblige.

This painting was done entirely in Photoshop CS6 Extended using a Wacom Cintiq 24″HD display.  No photos were used in the painting, aside from reference.  I didn’t keep track of how long it took me to complete it because I wasn’t on deadline or in a rush, so while I could easily say 20 hours, it was probably more, over a few weeks.  Without a deadline, I was able to nitpick it and get it as close to perfect as my current skills will allow.  At some point, however, I just have to call it done, because any changes become so minute that nobody will see them but me.

With all of my previous work, it has become my practice to start a painting at low resolution, usually around 9″X12″ at 72ppi.  Then, as the painting progresses, I will keep bumping up the size and resolution.  I teach this method in my PhotoshopCAFE DVD, “Animal Painting in Adobe Photoshop” and it’s the same practice I use for painting portraits of people.  There used to be two reasons for doing this.  First, when you’re working at low-res, you can’t get distracted by putting in too much detail because the size just won’t allow any.  This forces me to well establish ‘the bones’ of a likeness before working on wrinkles, skin texture, and hair.  The other reason for starting at low-res was that my computer had reached the end of it’s efficient life for this type of work and at full-size and full-res, the brushes just wouldn’t move well enough to make broad strokes across the digital canvas.  A completed painting was never more than 18″X24″ at 300ppi, because at that size, I could only work on the fine details without experiencing some lag.

Recently I had a new computer built and I’m back to working on a very current, high end machine.  Running 64bit Windows 7 with 64bit Photoshop, 16GB of RAM and a 4GB video card, everything is running incredibly smooth.  I could have started and finished this painting at full-res, without any problems at all.  BUT, I’m going to continue using my low-res to high-res workflow for the first reason I mentioned.  It forces me to get the likeness right and it works well for me.  That being said, I decided to push this painting to see if I could make it larger, which also allows more attention to detail.  This final painting is 32″X24″ at 300ppi.  At that size, the brushes were working just fine, and I could have bumped it up even more, with no issues in performance.

I’m still using the regular brushes in Photoshop and haven’t used any of the Mixer or Bristle brushes in my paintings.  Those brushes are designed to simulate traditional media and I honestly don’t feel the need to do that.  Digital painting is a medium all on its own, and I don’t try to make it into something it’s not.  I do intend to give those other brushes a try in the coming year, however, simply to see if they’ll offer me some choices to make my work better.  While I’m pleased with the quality of this painting and very much enjoyed working on it, there will always be room to improve.

Thanks for stopping by.